Path to function: Management > Connections > Add > API
Using the OpenAthens local authentication API, you can authenticate users based on credentials stored in any system to which you have programmatic access. This method is ideal in situations where you cannot use other connection types. It requires you to implement some code at your end.
Your local system should use at least two-factor authentication (e.g. username and password, barcode and pin).
If you're looking for information about the management API instead, see OpenAthens REST API documentation.
Preparation
Before you start, you need:
-
An API Key you have generated for this purpose. See API keys
-
An IT team with web programming experience
-
Access to the OpenAthens administration area at the domain level
If you are migrating from an alternative IdP such as Shibboleth, also see Migrating from your own IdP.
If you need technical help, consult your IT team. Our support team are also happy to help, but can fully support only the OpenAthens end of the connection.
Add the connection in OpenAthens
-
Log in to the OpenAthens admin area as the domain administrator.
-
Go to Management > Connections.

-
Under Local authentication in the left sidebar, press Create. A pop-up opens, showing available types of connector.

-
Select API and press Configure.

-
In Display name, enter a name for the connection. You can edit this later.
-
(Optional.) Enter a description of the connection in the Description field. You can edit this later.
-
Enter a Callback URL. This is where users are sent to sign in if they do not already have an OpenAthens session when they attempt to access a resource. For more detail, see implementing the API in your code. You can edit this address later.
-
Press Add. The connection is created. You can now view and edit its details.

The connection ID and connection URI are specific to your domain and are generated automatically. You will need to pass both of these values to your IT team, along with the API key you previously generated.
Fill in other fields of the Details tab as required. See Detail fields for an explanation of each field.
Detail fields
|
Field |
Explanation |
|---|---|
|
Display name |
The name of the connection, as it will appear in our authentication point when there is a choice of connector. |
|
Description |
The description of the connection, as it will appear in our authentication point when there is a choice of connector. |
|
Connection ID |
The connection ID that needs to be specified in the API call payload. Pass this to your IT team before they begin implementation. |
|
Connection URI |
The domain specific URI where the API will be expecting the POST. Pass this to your IT team before they begin implementation. |
|
Callback URL |
An address in your site or application to which users are sent for authentication. See Implementing the API connector in your code. |
|
Status |
Not Live = connection can be used only in debug mode. The visibility and default flags are ignored. Live and Visible (if this is the only local connection) = connection can be used only in debug mode. Live and Visible (if there are multiple live and visible connections) = users are offered a choice of connections, including this one. There is a domain preference to include OpenAthens accounts or not. Live and Visible and Default = this is your only login option and users will be sent directly to your login whenever the organisation is known. A successful authentication will tell the authentication point to remember that location. A failed authentication will clear location preferences. Debug mode will not show other login options. Changes to the status usually take effect within a few minutes. |
|
Create local accounts |
Automatically: any user authenticated by your system and passed back to us is deemed OK and will be accepted by the system. Manually: only user IDs you have previously uploaded via the list page will be accepted by our systems. Unlisted users will be denied access and you will see organisation mapping errors in the reports interface. |
|
Remove local accounts |
This setting controls when local account data will be automatically cleared from the system and is the number of days from the last time the account last signed in. Pre-mapped accounts that have not been seen are also cleared. The setting can be from 1 to 365 days and represents the number of complete days that have passed since the date the account last signed in, i.e. does not include the day of the last sign-in in the count. See also: How to modify a local account.
|
|
Salt value |
The salt used to generate a targetedID for users authenticated by this connection. This value is used only if you are migrating from a SAML product such as Shibboleth or OpenAthens LA. You are unlikely to need it when adding an API connector. |
Set up your application
To configure the API connector in your local application, see Implementing the API connector in your code.
Your IT team will need the following information:
-
The API key you generated previously
-
Connection ID (copy from the connection’s Details tab in OpenAthens)
-
Connection URI (copy from the connection’s Details tab in OpenAthens)
Configure mappings and permission sets
The final two areas to configure are permission set rules and attribute mappings:
-
Permission set rules so that your users as assigned an appropriate set of resources
-
Attribute mappings so that OpenAthens can make use of data passed it by your source.
OpenAthens will cache these attributes when the user signs in, so changes at your end won't be picked up until the next time the user starts an OpenAthens session
Both of these functions can only look at data in the attributes array you pass.
When you're ready to go live, go to the Details tab of the connection and set the Status to Live and Visible. Save your changes. Your new connection should be available in the authentication point in a few seconds.
How to test
Discovery is not available until you set the connection as Live and Visible, so that users do not get offered options that are not ready to be used. To test your connection before going live, you will need to use debug mode to make the connection selectable by you.
Once you have tested and are happy, you can set the connection as Live, Visible and optionally Default (where available), then save. This will make it live for your users within a few seconds.
Multiple connectors and OpenAthens accounts
This type of connector is best used as the default connection. In this mode, when a user arrives at our authentication point with your organisation known, such as would happen if they select it at a resource's login, use a WAYFless URL, use the Redirector or have previously authenticated successfully, they are passed directly to your login without seeing our authentication point.
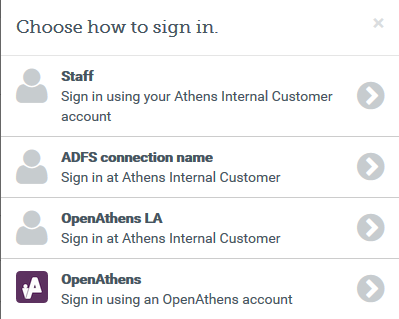
If you need to use multiple connections, or OpenAthens accounts alongside local accounts - e.g. if you have a group of users that are not in your directory - then you can set the connection as Live and Visible but not Default, and set it to allow OpenAthens accounts via the setting on the domain preference page. In this mode, when the user arrives at the authentication point with your organisation known, they can select the connection they want to choose from all Live and Visible local connections as well as OpenAthens accounts. The authentication point remembers their choice for next time.
Multi-valued attributes
With multi-valued attributes, such as the memberOf field in ADFS, the interface is unable to display all values and will display only one. However, all values are read and cached, so are available for functions like permission set rules and attribute release.
Anything to watch out for?
Minimum TLS version is 1.2.
If you are planning to pre-upload user identifiers, you will need to have at least one local account visible in the list to access the upload button. Do not delete all your test logins until at least some of your pre-mappings are uploaded.