Path to function: Management > Connections > Add > CAS
OpenAthens can connect to CAS (Apereo/JASIG's Central Authentication Service), so that you do not have to issue personal accounts for your users (you will still need your OpenAthens administrator account).
As well as the ability to use local accounts instead of maintaining a separate set of credentials, accesses to federated resources that already involve discovery (identifying the user’s home organisation) will take the user directly to your CAS login.
Preparation
Before you start, you need:
-
A CAS server with SAML support enabled (v5.x or later)
-
A member of your IT team to update CAS settings and supply the CAS metadata
-
Ideally an externally accessible URL for your CAS metadata. Failing that, a copy of the CAS metadata as an XML file
-
All users to be in CAS
-
Access to the OpenAthens administration area at the domain level
If you are migrating from an alternative IdP such as Shibboleth, also see Migrating from your own IdP.
If you need technical help, consult the CAS documentation or your IT team. Our support team are also happy to help, but can fully support only the OpenAthens end of the connection.
Add the connection in OpenAthens
-
Log in to the OpenAthens admin area as the domain administrator.
-
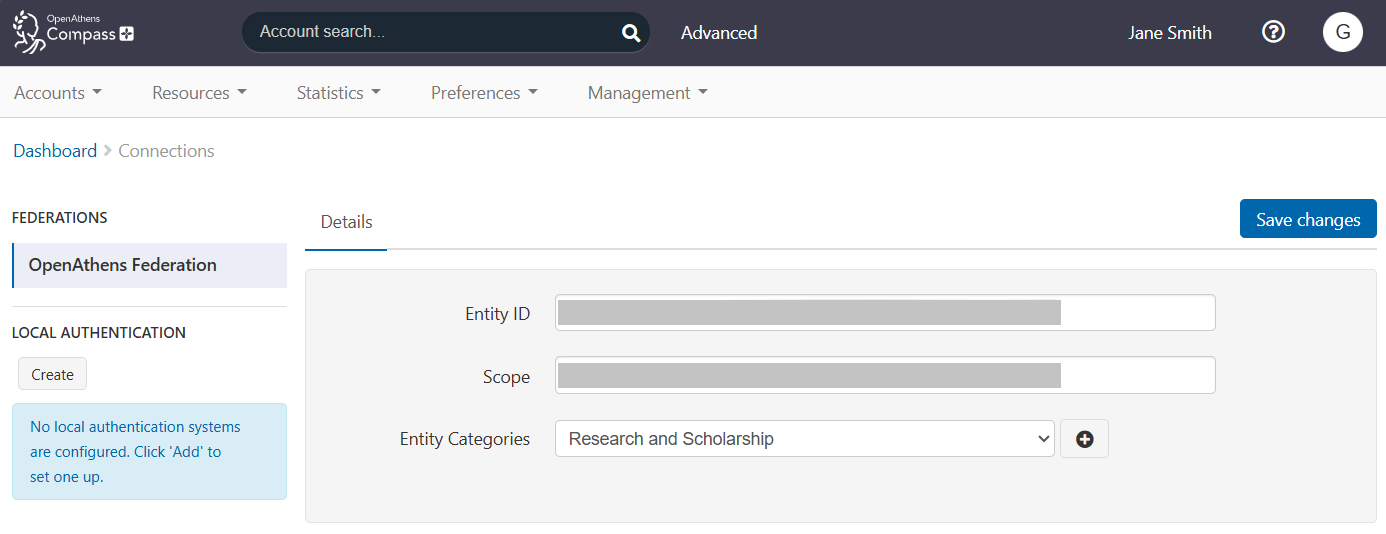
Go to Management > Connections.
-
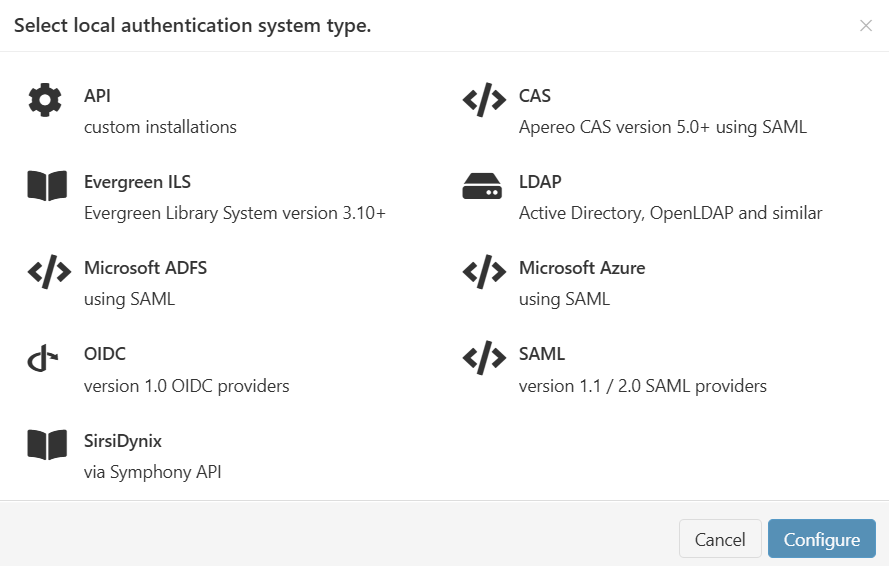
Under Local authentication in the left sidebar, press Create. A pop-up opens, showing available types of connector.
-
Select CAS and press Configure.
-
Either:
-
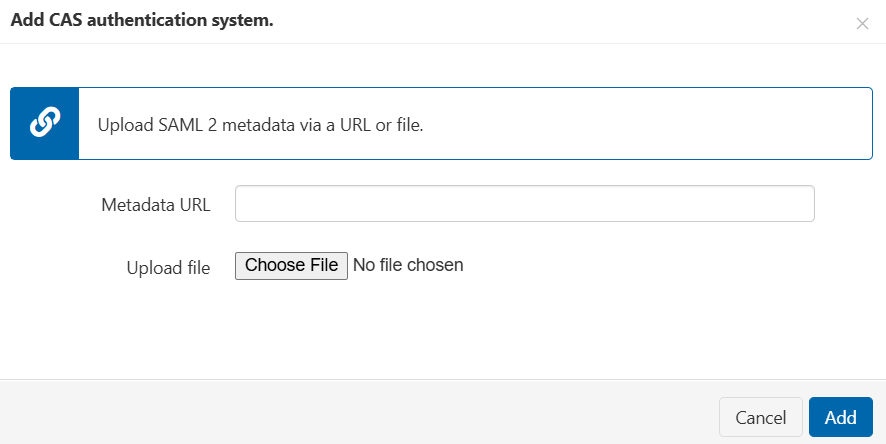
In the Metadata URL field, enter the URL of the CAS metadata. The metadata URL is typically something like
https://HOST_NAME/cas/idp/metadata. It must be accessible outside your network. -
Press Choose File and upload the CAS metadata file supplied by your IT team.
-
-
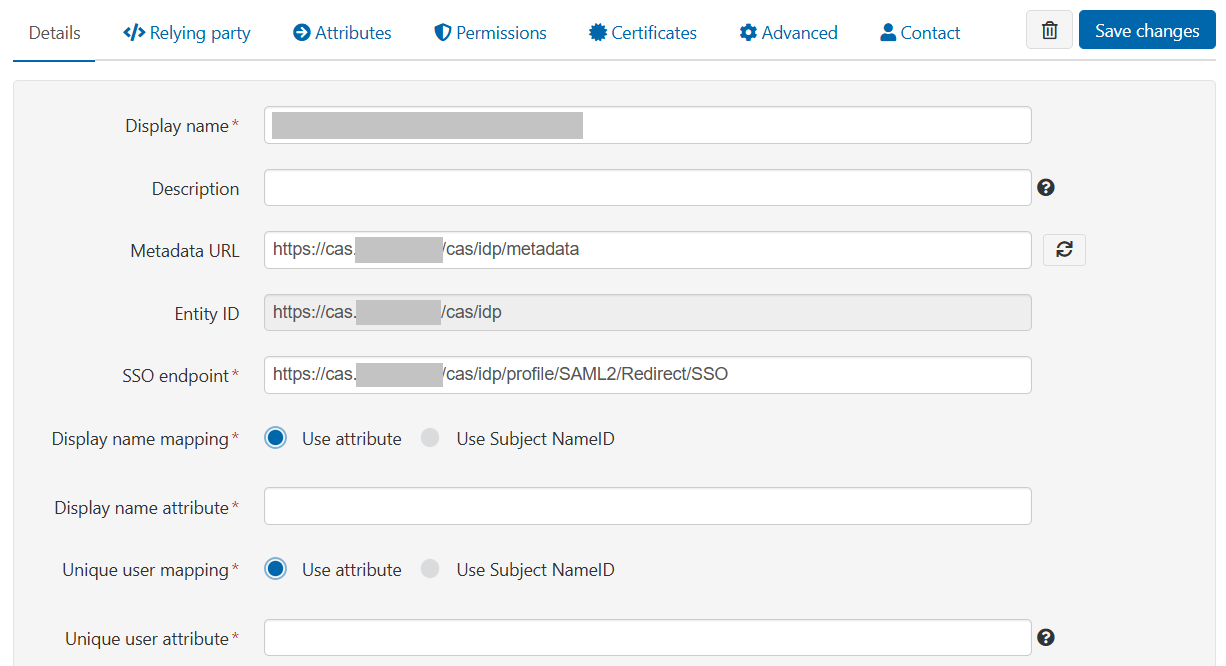
Press Add. The connection is created. You can now view and edit its details.
-
Set Unique user attribute to the attribute you will send as the user identifier. You can change this later.
-
Set Display name attribute to the attribute you will send to identify this connection publicly (e.g. where users log in). If you are sending only one attribute or are not sure, set this to the same value as Unique user attribute. Again, you can change this later.
-
Complete other fields as required. See Detail fields, below, for an explanation of each field.

-
Do not set the Status as Default at this time.
-
Save your changes.
-
Lastly, go to the Relying party tab and copy the Metadata URL shown there. You will need this to configure the connection in CAS.

Detail fields
|
Field |
Explanation |
|---|---|
|
Display name |
Name of the connection, as it will appear in our authentication point when there is a choice of connector. Defaults to the name specified in the CAS metadata. |
|
Description |
Description of the connection, as it will appear in our authentication point when there is a choice of connector. |
|
Metadata URL |
Where the CAS metadata is published. Populated only when metadata is loaded from a URL, this setting allows easy updates to the connection if your CAS system changes. |
|
EntityID |
The entity identifier of your CAS instance. Drawn from the CAS metadata. |
|
SSO endpoint |
The login address, typically something like |
|
Display name attribute |
The attribute you specify here supplies the value displayed in account lists and audit trails where you would normally see the OpenAthens username. It can be the same as the Unique user attribute. |
|
Unique user attribute |
The attribute you specify here must supply a value unique to the user within the current user set and should supply a pseudonymous value unique to that user for all time. This is used by the system to tell users apart and also used in the generation of targetedIDs and statistics. It does not have to be the username entered at your login point. If using the SAML NameID here, the requirement for unique and persistent limits the type to either of:
|
|
Status |
Not Live = connection can be used only in debug mode. The visibility and default flags are ignored. Live and Visible (if this is the only local connection) = connection can be used only in debug mode. Live and Visible (if there are multiple live and visible connections) = users are offered a choice of connections, including this one. There is a domain preference to include OpenAthens accounts or not. Live and Visible and Default = This is your only login option and users will be sent directly to your login whenever the organisation is known. A successful authentication tells the authentication point to remember that location. A failed authentication clears location preferences. Debug mode will not show other login options. Changes to the status usually take effect within moments. |
|
Create local accounts |
Automatically: any user authenticated by your system and passed back to us is deemed OK and will be accepted by the system. Manually: only user IDs you have previously uploaded via the list page will be accepted by our systems. Unlisted users will be denied access and you will see organisation mapping errors in the reports interface. |
|
Remove local accounts |
This setting controls when local account data will be automatically cleared from the system and is the number of days from the last time the account last signed in. Pre-mapped accounts that have not been seen are also cleared. The setting can be from 1 to 365 days and represents the number of complete days that have passed since the date the account last signed in, i.e. does not include the day of the last sign-in in the count. See also: How to modify a local account.
|
|
Salt value |
The salt used to generate a targetedID for users authenticated by this connection. You might edit the salt if upgrading from something like Shibboleth, so that your users can have the same targetedID value when they change systems. If you set it to blank, the connection will use the same salt as your OpenAthens accounts. Avoid modifying this after you go live, which will change the user identifiers seen by service providers. |
Add OpenAthens as a service in CAS
The following section assumes you are familiar with CAS. For technical help, see the CAS documentation or consult your IT team.
-
Register the address you copied from the Relying party tab in OpenAthens as both the entityID and the metadata URL in your CAS service registry. For example:
{ "@class" : "org.apereo.cas.support.saml.services.SamlRegisteredService", "serviceId" : "https://login.openathens.net/saml/2/metadata-sp/domain.com/la/CONNECTOR_ID", "name" : "OpenAthens", "id" : 10000003, "evaluationOrder" : 10, "metadataLocation" : "https://login.openathens.net/saml/2/metadata-sp/domain.com/la/CONNECTOR_ID" } -
Set up your attribute release policy to release a unique user identifier. This identifier can be an attribute or the SAML nameID, but it must be persistent and unique amongst current users. Ideally it would be pseudonymous and unique for ever (i.e. never assigned to a new user).
Depending on your library's needs, this may be sufficient. However, you will often want to release more information so that attributes can be mapped to OpenAthens attributes and used for organisation, statistics, resource access, display names and resource allocation. For example:
-
First and last names to help the library identify users
-
Email address to help the library contact users and, in certain cases, release that data to service providers
-
A group attribute of some type, so that the library can assign different permission sets to different groups of users based on rules
-
An attribute to serve as a display name
In all cases, the library will need the name of the attribute(s) for the next part of the setup. Attribute names are case sensitive.
Configure mappings and permission sets
The final two areas to configure are permission set rules and attribute mappings:
-
Permission set rules so that your users as assigned an appropriate set of resources
-
Attribute mappings so that OpenAthens can make use of data available from your LDAP
When you're ready to go live, set the Status of the connection to both Live and Visible. Save your changes. Your new connection should be ready for testing a few seconds later.
How to test
Discovery is not available until you set the connection as Live and Visible, so that users do not get offered options that are not ready to be used. To test your connection before going live, you will need to use debug mode to make the connection selectable by you.
Once you have tested and are happy, you can set the connection as Live, Visible and optionally Default (where available), then save. This will make it live for your users within a few seconds.
Multiple connectors and OpenAthens accounts
This type of connector is best used as the default connection. In this mode, when a user arrives at our authentication point with your organisation known, such as would happen if they select it at a resource's login, use a WAYFless URL, use the Redirector or have previously authenticated successfully, they are passed directly to your login without seeing our authentication point.
If you need to use multiple connections, or OpenAthens accounts alongside local accounts - e.g. if you have a group of users that are not in your directory - then you can set the connection as Live and Visible but not Default, and set it to allow OpenAthens accounts via the setting on the domain preference page. In this mode, when the user arrives at the authentication point with your organisation known, they can select the connection they want to choose from all Live and Visible local connections as well as OpenAthens accounts. The authentication point remembers their choice for next time.
Multi-valued attributes
With multi-valued attributes, such as the memberOf field in ADFS, the interface is unable to display all values and will display only one. However, all values are read and cached, so are available for functions like permission set rules and attribute release.
Other tabs
Certificates
In the Certificates tab, you can add a second certificate. Use this feature if you need to change a server certificate at your end and want to minimise downtime for users.
Advanced
In the Advanced tab, you can make several changes that are rarely necessary:
-
Switch between SAML versions, should you have a source that can only handle the older SAML 1 profile
-
Switch the profile from Redirect to Post if your source insists on it
-
Enable signing of authentication requests (SHA-1 or SHA-256) if your source requires it
-
Enable the SAML
forceAuthnoption (forces your local source to re-authenticate any time the user is sent there - e.g. where users can have multiple affiliations within a consortium and your SAML source's session management makes it difficult for them to change).
Anything to watch out for?
The minimum supported TLS version is 1.2.
If you use the ![]()
Pseudonymous?
Pseudonymous identifiers are recommended for the unique user attribute to avoid potential problems with data protection legislation, since that identifier will live on for a time in the audit trail after other mapped attributes are cleared.