
Path to function: Accounts > Create > Administrator account
An administrator account gives access to the OpenAthens admin area. Administrators can have different levels of access, depending on their role.
Creating an administrator account is similar to adding a personal account, with the following differences:
-
You select an administrator role at the start
-
The new user can change their password even if you set it manually
Administrator roles
At least one of the following two roles will be available:
Owner
-
Can access all available functions including the schema editor, release policies and domain-wide settings
-
Can administer all users and all sub-organisations
-
Can switch into all sub-organisations (e.g. to manage permission sets)
-
Can create and administer other owners and administrators
-
The account must sit directly under the domain organisation
Administrator
-
Can access all functions except the schema editor, release policies and domain-wide settings
-
Can administer and switch into their own sub-organisations
-
Can be under any organisation or sub-organisation
-
Cannot create or administer owners
Depending on other settings, you may also see:
Service provider administrator
Allows publishers and other service providers to configure applications and connections in the OpenAthens federation.
Service provider report viewer
Gives a reports-only view of the service provider dashboard for publishers and other service providers.
Create an administrator account
-
Log in to the Compass admin area (https://admin.openathens.net).
-
(Optional.) To create the administrator in a sub-organisation rather than in the main organisation, switch to the sub-organisation before you begin.
-
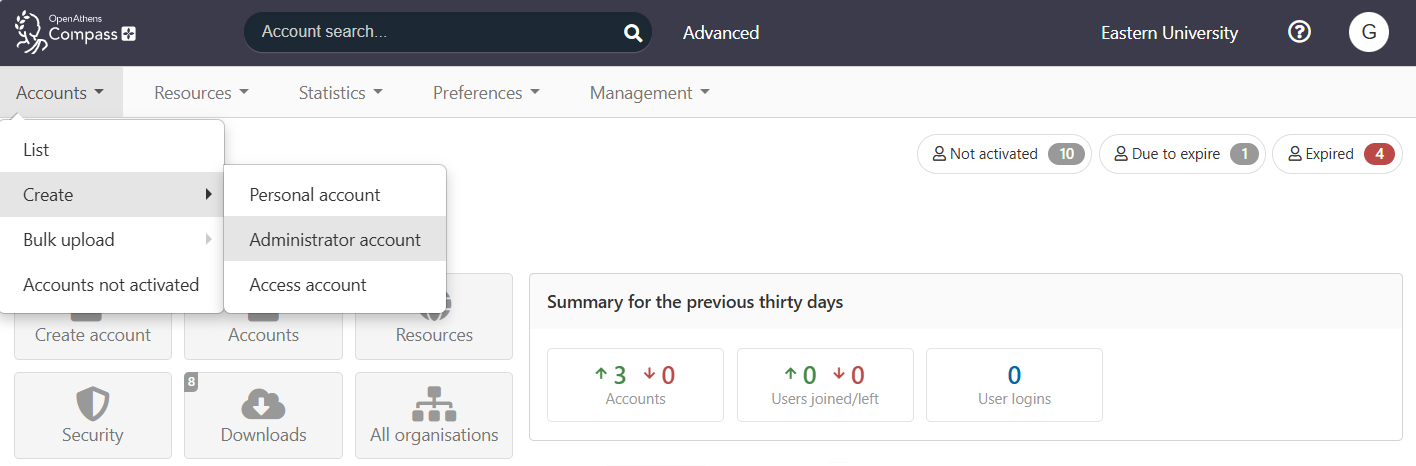
From the main menu, select Accounts > Create > Administrator account.
-
The account creation wizard opens in a pop-up window. There are four steps to complete. See the following sections for details.
Login tab
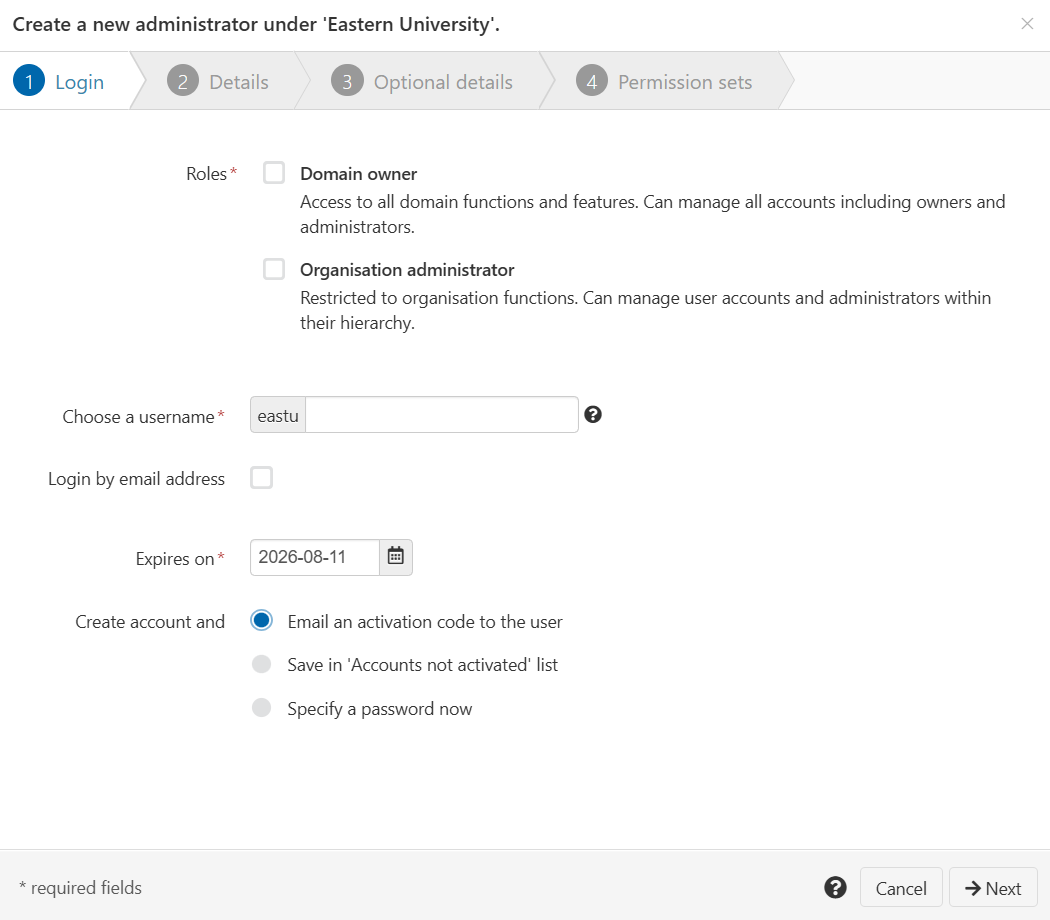
In the first section, complete login details for the new administrator.
-
Under Roles, select the appropriate role(s) for this administrator. See Administrator roles, above, for details. (If you are creating the administrator in a sub-organisation, only the Organisation administrator role will be available.)
-
In Choose a username, enter a unique username for the administrator. The name must be 6-20 characters long, including the domain prefix (which is already loaded into the field). It may contain letters, numbers, the dot (.), the hyphen (-) and the underscore (_), but must not contain special characters or spaces.
-
To enable the administrator to log in using their email address instead of their username, tick Login in by email address. (We recommend not turning on this setting if the administrator has more than one account.)
-
Set Expires on to the date on which the account should expire. This setting defaults to the expiry period set in your account preferences.
-
Set Create account and… to one of the following options:
-
Email an activation code to the user. (Recommended.) Once the administrator’s account is set up, they will be prompted to activate the account and create a password of their choice.
-
Save in ‘Accounts not activated’ list. The new account will be inactive until you or another administrator change its status. This option can be useful if you create users in advance of going live.
-
Specify a password now. Manually create an initial password for the administrator. The new administrator will be prompted to activate their account, and can then create a new password if they wish.
-
-
If you chose Specify a password now, enter a password for the user in the Password field. Follow the on-screen guidelines to create a strong password.
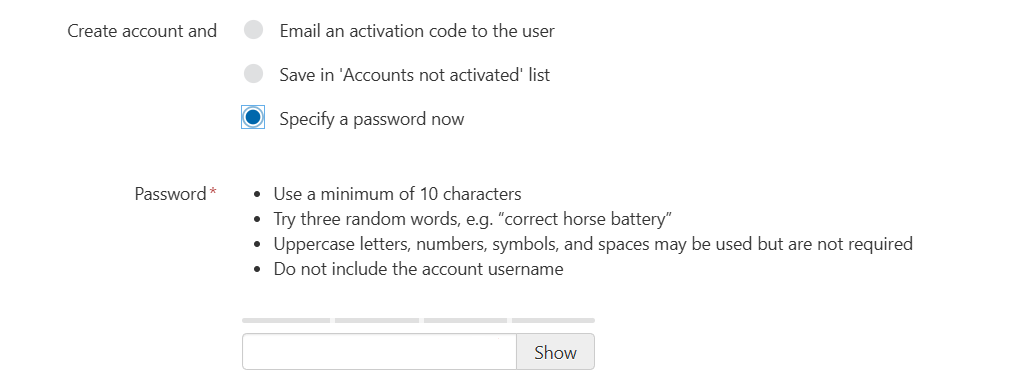
If you chose Email an activation code to the user or Save in ‘Accounts not activated’ list, the Password field is not shown.
-
Press Next to continue.
If the new administrator has more than one OpenAthens account (for example, a personal account to access resources), we recommend not turning on Login by email address. Logging in by username enables the administrator to distinguish between their accounts.
Details tab
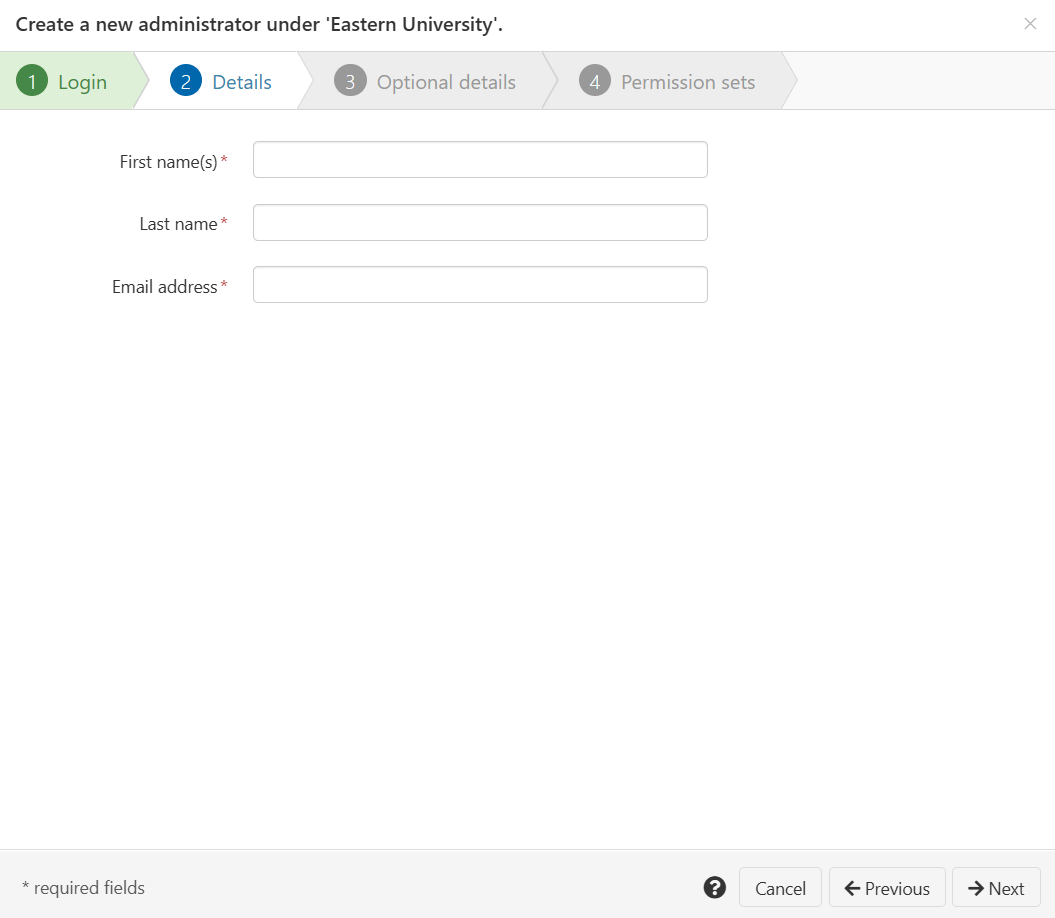
You must complete all fields in this section.
-
In the First name(s) field, enter the administrator’s forenames.
-
In the Last name field, enter the administrator’s surname.
-
In Email address, enter the administrator’s institutional email.
-
If you have a custom schema, this tab may include other fields. Complete any additional details that are required.
-
Press Next to continue.
Optional details tab
In this section, fill in other details about the administrator that are relevant to your organisation. If your organisation has a custom schema, there may be fields other than those shown here. All fields are optional.
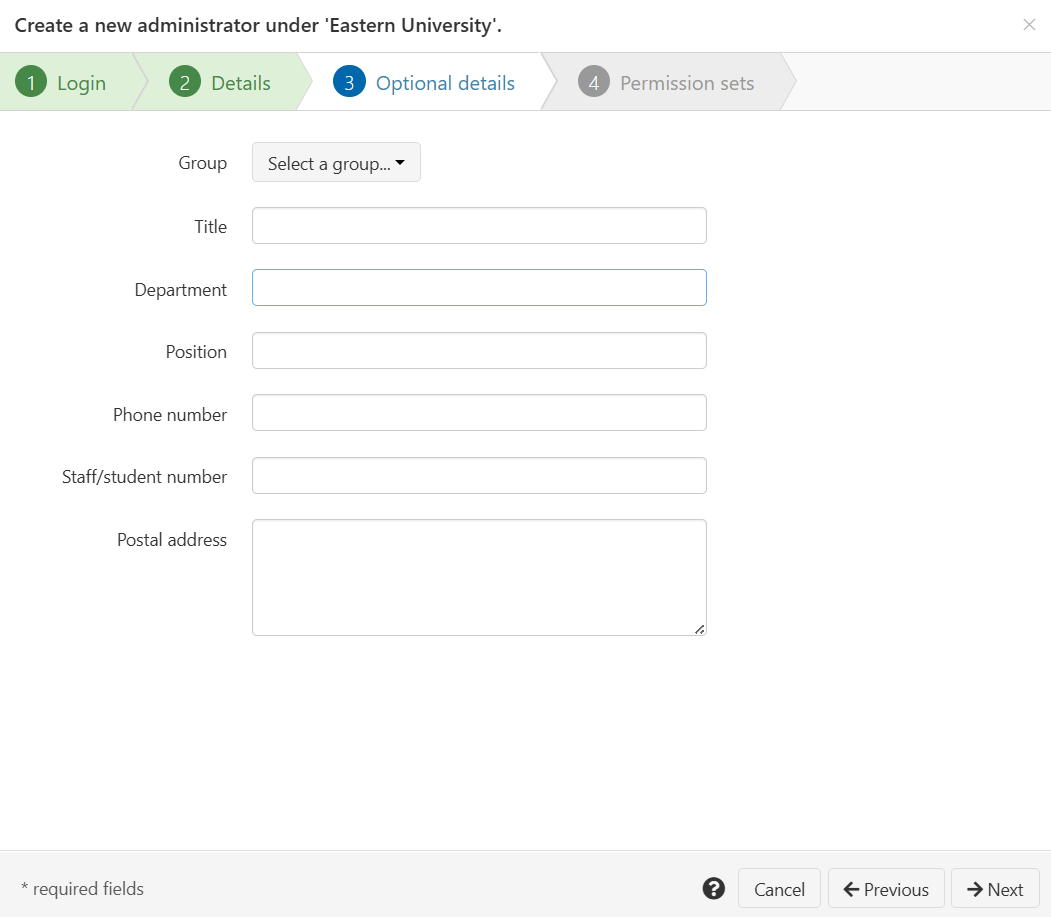
-
Complete any details that are relevant. Some details might be pre-filled if they have already been set for the organisation.
-
Press Next to continue.
Permission sets tab
You might need to assign permission sets to the administrator if they will also access subscription content as an end user. (Alternatively, the administrator could have a separate personal account for this purpose.)
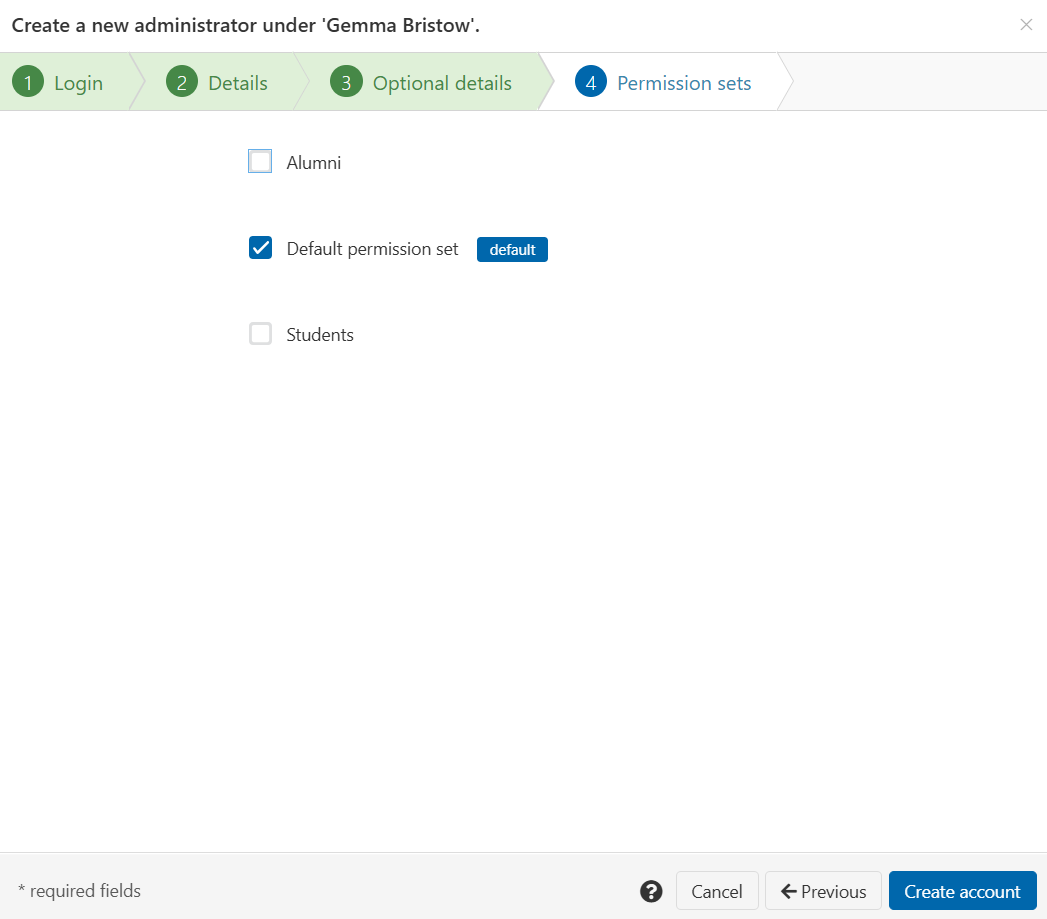
-
Tick or untick permission sets to create the right permissions for this account.
-
Press Create account to finish.
The account is now created. The new administrator will receive a confirmation email and (if relevant) will be prompted to activate their account.
Anything to watch out for?
Like personal accounts, administrator accounts are monitored for misuse and can be banned.