
Path to function: Accounts > Create > Personal account
A personal account gives an individual, named user access to your subscription content.
To create a personal account, complete a four-step wizard. Default values for some data fields, such as the options for activating an account, are set under account preferences.
To add a large number of accounts, you can upload personal accounts in bulk instead of creating each account individually.
Create a personal account
-
Log in to the Compass admin area (https://admin.openathens.net).
-
(Optional.) To create the account under a specific sub-organisation, switch to the sub-organisation before you begin.
-
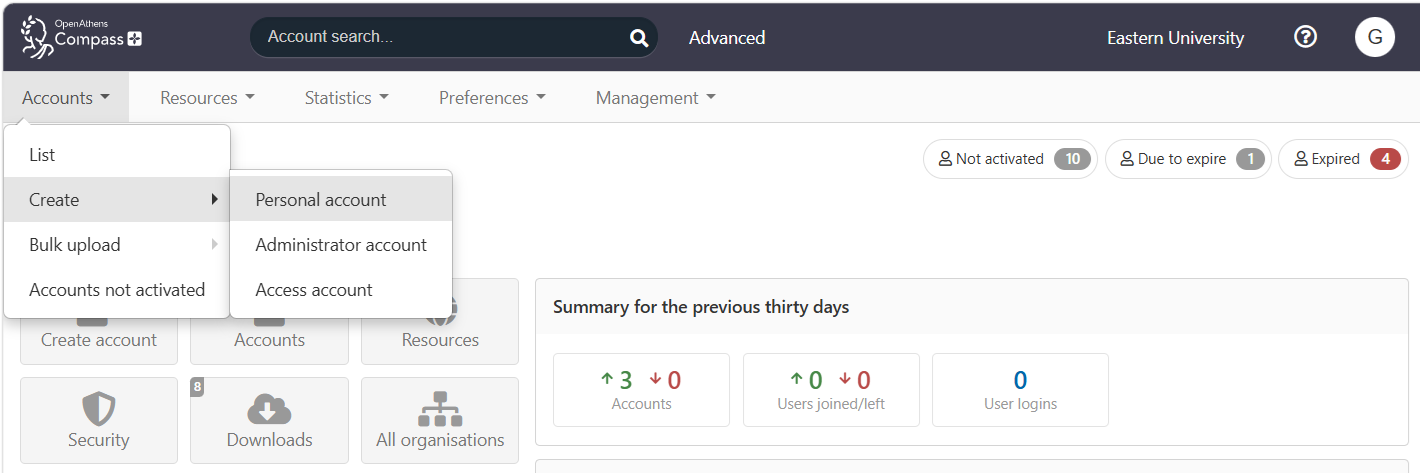
From the main menu, select Accounts > Create > Personal account.
-
The account creation wizard opens in a pop-up window. There are four steps to complete. See the following sections for details.
Login tab
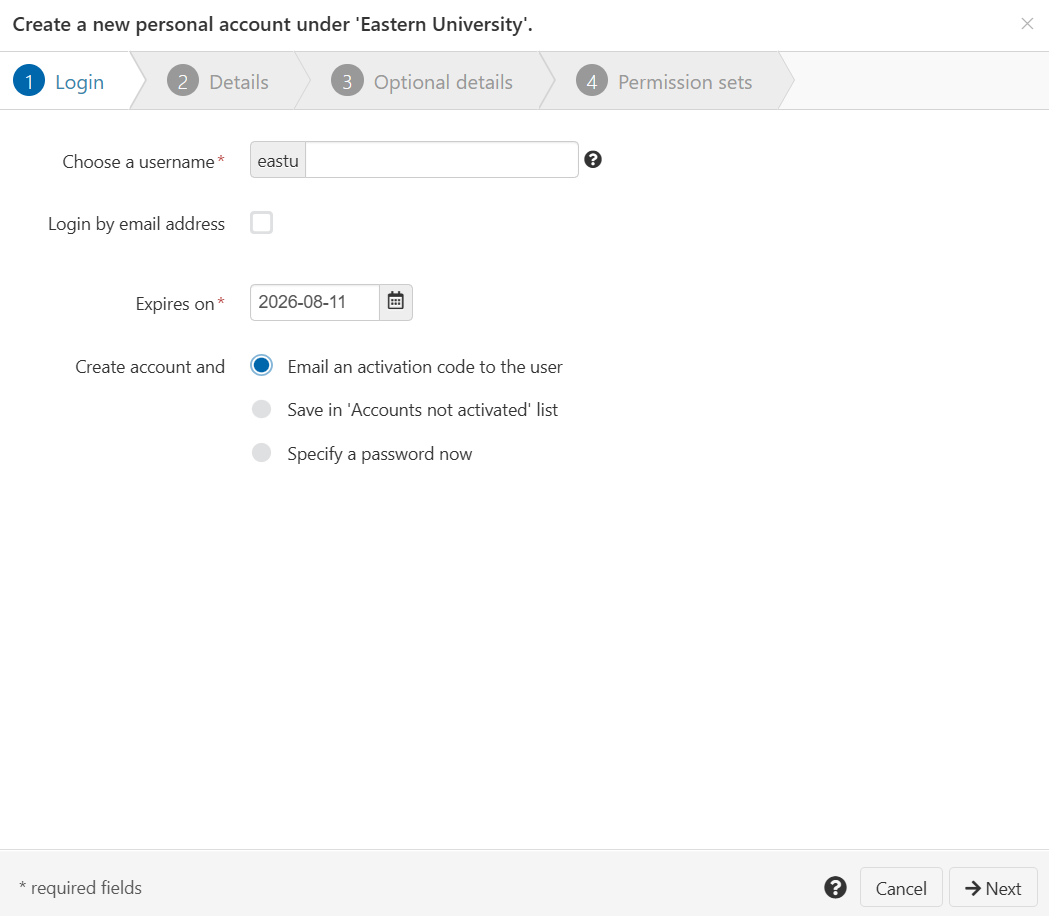
In the first section, complete login details for the new user.
-
In Choose a username, enter a unique username for the new user. The name must be 6-20 characters long, including the domain prefix (which is already loaded into the field). It may contain letters, numbers, the dot (.), the hyphen (-) and the underscore (_), but must not contain special characters or spaces.
-
To enable the user to log in using their email address instead of their username, tick Login in by email address.
-
Set Expires on to the date on which the account should expire. This setting defaults to the expiry period set in your account preferences.
-
Set Create account and… to one of the following options:
-
Email an activation code to the user. (Recommended.) Once the new user’s account is set up, they will be prompted to activate the account and create a password of their choice.
-
Save in ‘Accounts not activated’ list. The new account will be inactive until you or another administrator change its status. This option can be useful if you create users in advance of going live.
-
Specify a password now. Manually create a password for the user and activate their account immediately.
-
-
If you chose Specify a password now, enter a password for the user in the Password field. Follow the on-screen guidelines to create a strong password.
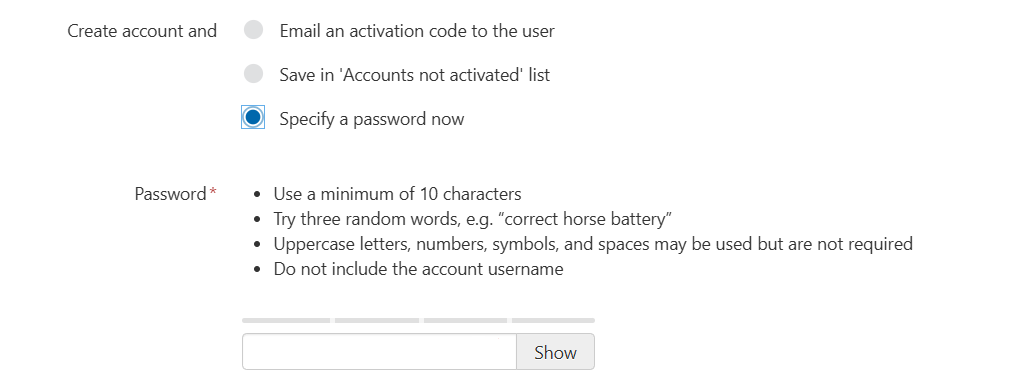
If you chose Email an activation code to the user or Save in ‘Accounts not activated’ list, the Password field is not shown.
-
Press Next at the bottom of the window.
Unfortunately, a username cannot include non-English characters. To enable users to log in under a correctly spelled version of their name, you may wish to use Login by email address.
Details tab
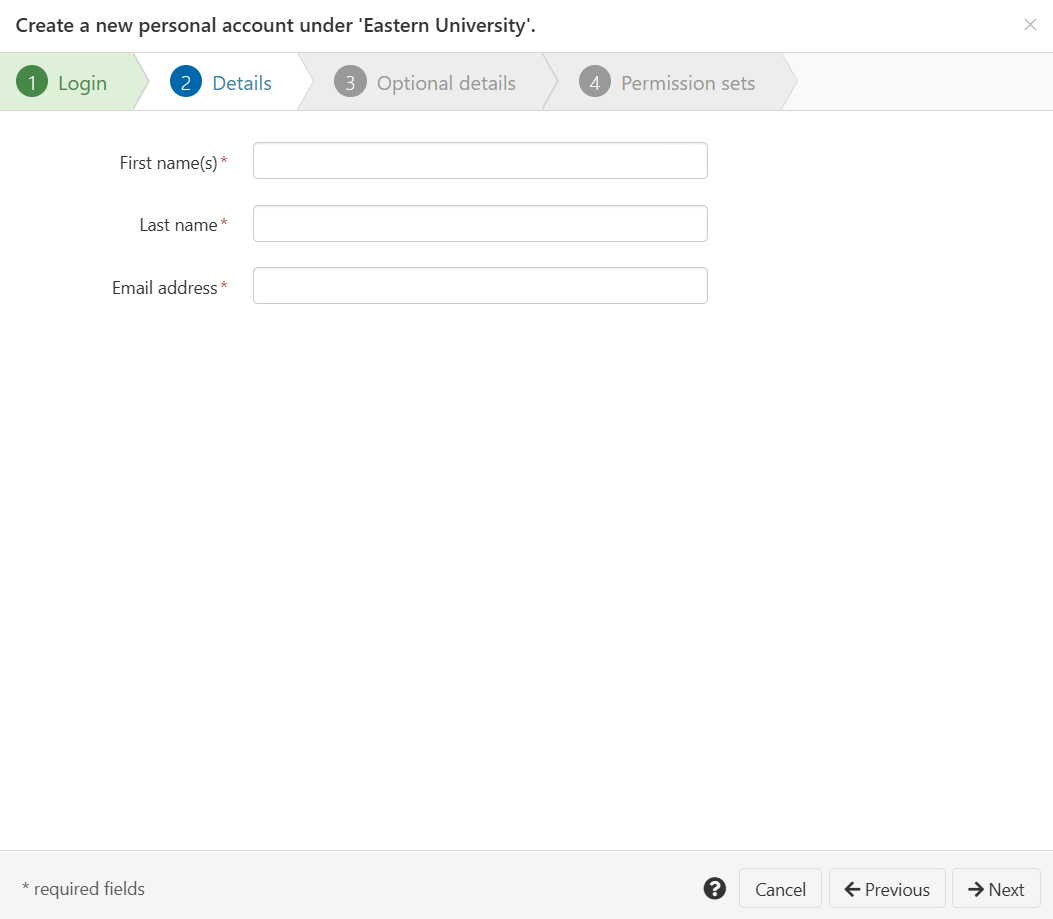
You must complete all fields in this section.
-
In the First name(s) field, enter the user’s forenames.
-
In the Last name field, enter the user’s surname.
-
In Email address, enter the user’s institutional email.
-
If you have a custom schema, there may be other fields in this tab. Complete any additional details that are required.
-
Press Next to continue.
If you enter an email address that is a duplicate, you will get a warning. Try searching for the address to check if the user already has an account, or if they formerly had an account that has been deleted.
If you cannot find the address through search, it’s possible that:
-
The user’s account is in a sub-organisation to which you do not have admin access
-
The user has an account in a different domain
Optional details tab
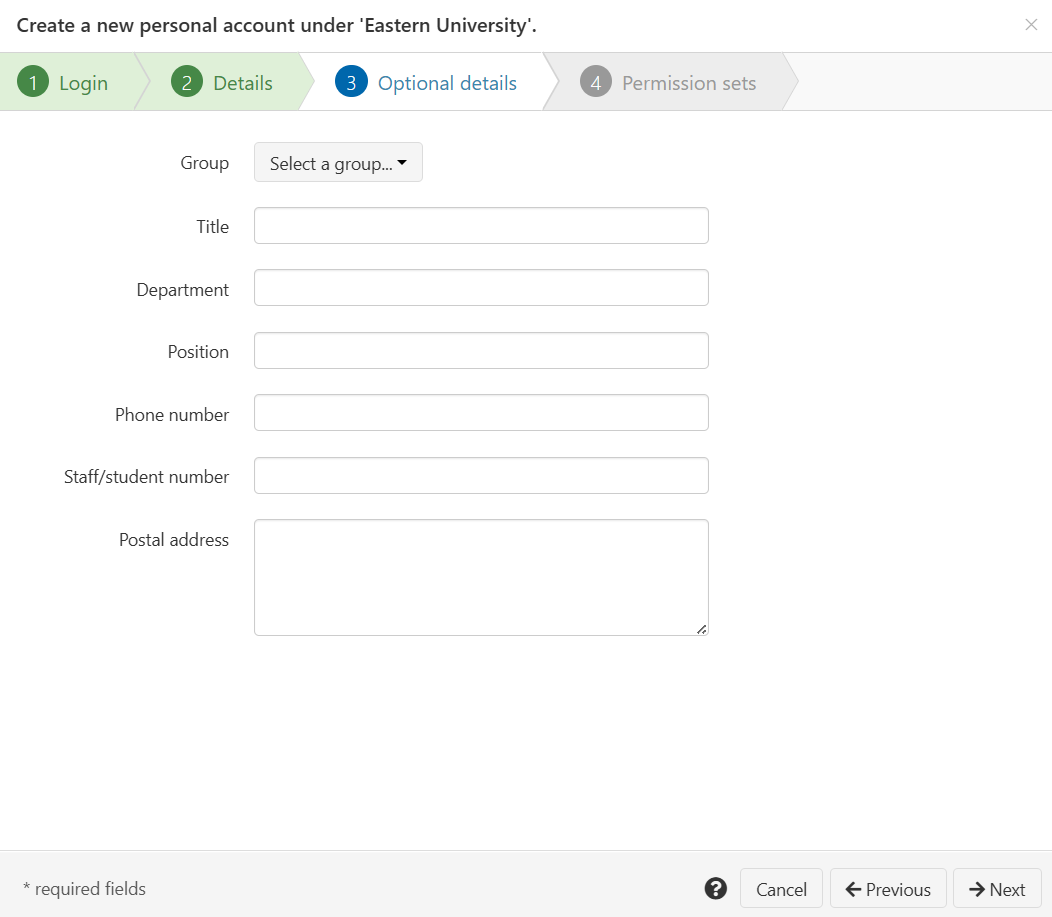
In this section, fill in other details about the user that are relevant to your organisation. If your organisation has a custom schema, there may be fields other than those shown here. All fields are optional.
-
Complete any details that are relevant. Some details might be pre-filled if they have already been set for the organisation.
-
Press Next to continue.
Permission sets tab
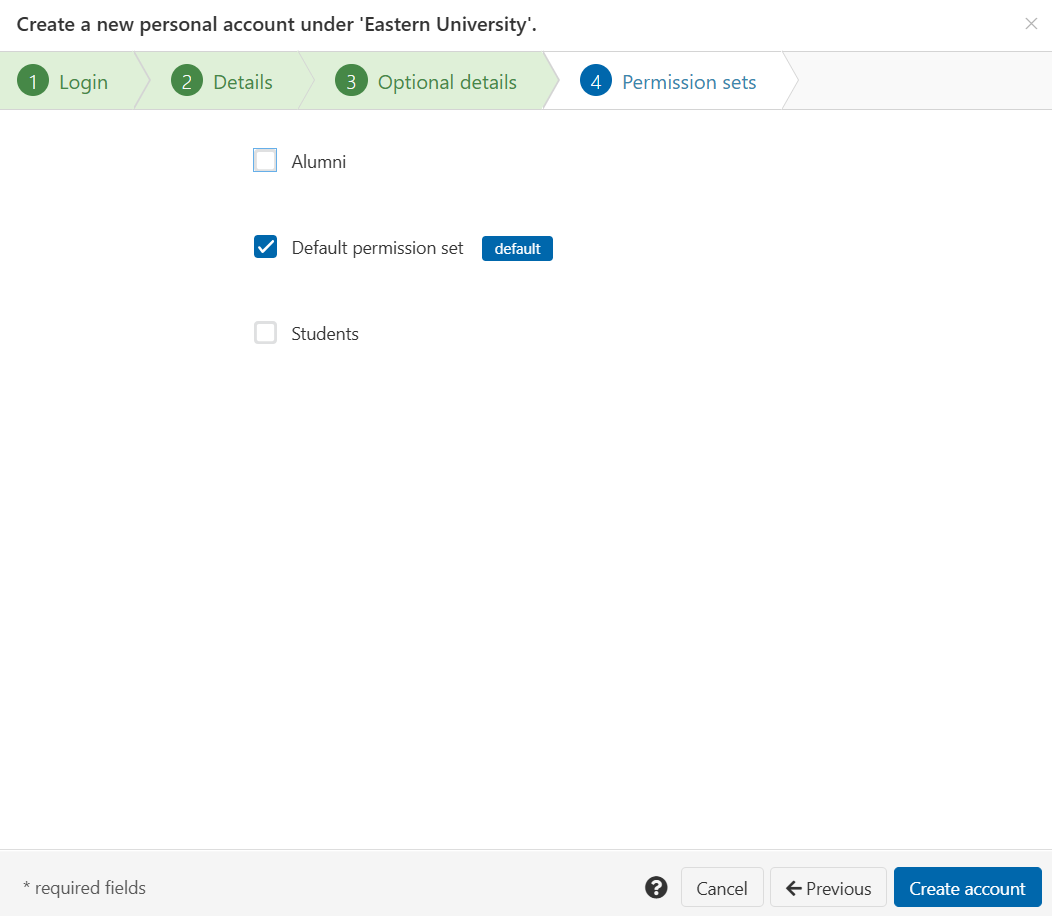
In this section, assign permission sets to the account. The default permission set is assigned unless you specify otherwise.
For more detail about the options available, see Resources > Permission sets.
-
Tick or untick permission sets to create the right permissions for this account.
-
Press Create account to finish.
The account is now created. If you selected the option Email an activation code to the user, the new user will be sent an email with instructions to activate their account.