The UK federation and Jisc are running a service called VerifID which allows staff and students from qualifying institutions to get discounts at various retailers. See UK Access Management Federation: VerifID.
This page covers how to make sure you're set up to help your users get these discounts.
Prerequisites
-
You need to be in the UK Access Management federation. Check this under Management > Connections and look in the federations section
What you need to check (or change)
Step 1
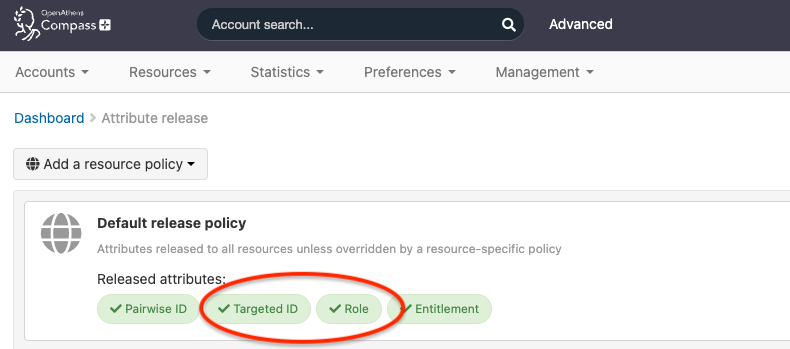
The first thing to check is your attribute release policy: Preferences > Attribute release.
Look first at the default policy at the top of the page. What you want to see there are green 'pills' with a tick that include role and Targeted ID. If you see those, go to step 2
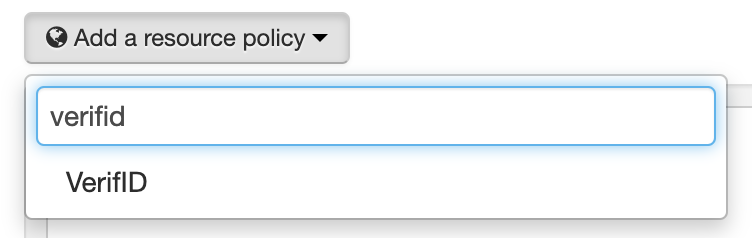
If you don't see them, click on the add policy button and start typing VerifID - select it when you see it.
From the list of attributes you see, find and click on Role and Targeted DI to turn them green and show a tick.
Click on done on the policy, and then save at the top of the page.
or
+

Step 2
Next thing is to look at your permission sets. Are they assigned in a way that can tell the difference between staff and student? The reason for this is that the role you released in step 1 is defined by permission sets:
Yes, I already split my permission sets by staff and student
That's good news - you already have everything you need, and may already be set up for this.
-
List your permission sets (Resources > Permission sets)
-
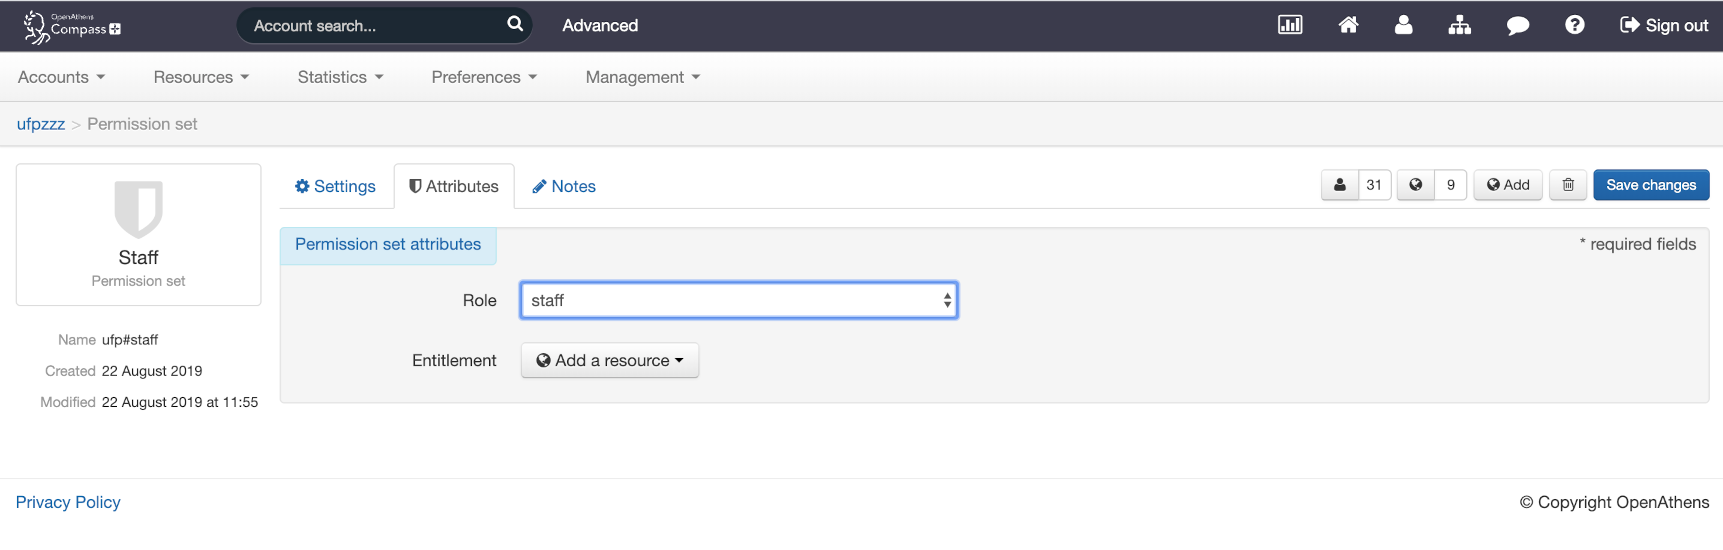
For as many permission sets as it takes to cover all staff (might only need one), select it in the list to open up the details and switch to the attributes tab.
-
Look at the role - there's a drop down of choices, and if it doesn't already say staff, change it to staff.
-
-
Save changes and repeat as necessary
-
-
Do the same for students
-
Make yourself a nice cup of tea - you're done
I don't currently have different permission sets for staff and students
What you need to do here depends on if you are using OpenAthens accounts, or have connected a local directory. A way to tell is to go to reports.openathens.net and look at the Accounts > Totals report. If mostly listed as 'Personal' then you're using OpenAthens accounts. If they're mostly listed as a name your IT team might have come up with, then you're using local accounts.
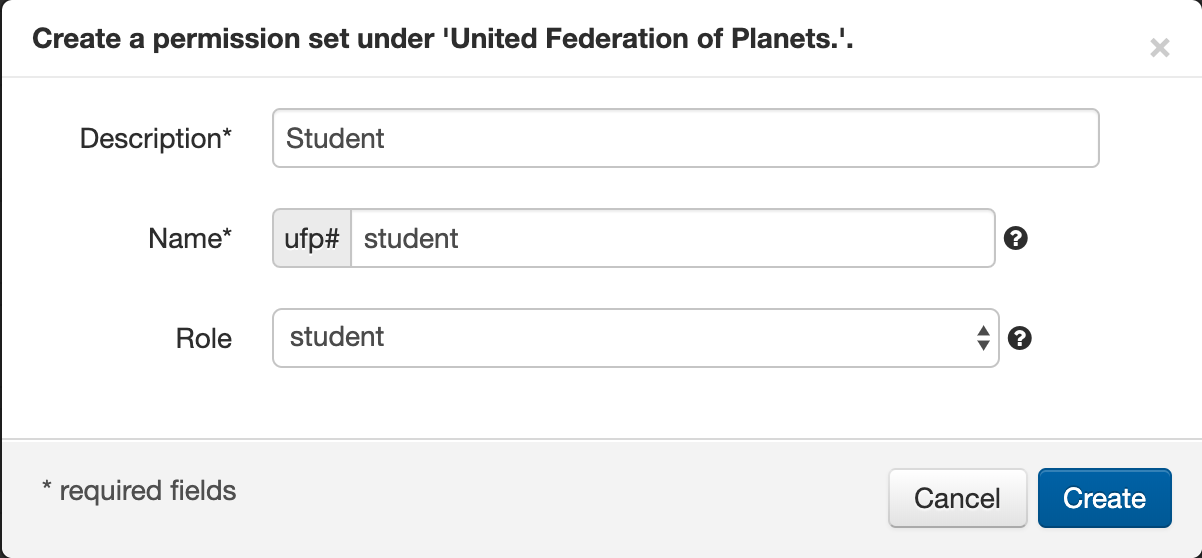
In both cases you'll need to add two permission sets (Resources > Permission sets > Add), one for staff, one for students, and on the attributes tab of both select the appropriate role.
I’m using OpenAthens accounts
I can tell staff and student apart by group, or other factor such as email
If your staff are in a group...
-
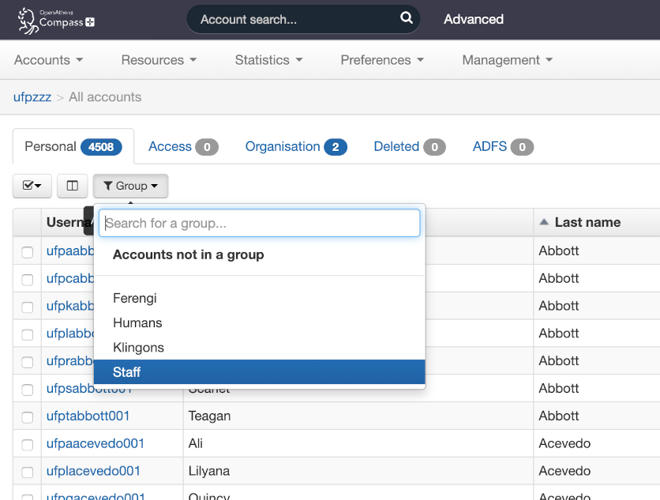
Accounts > List
-
From the group button, select the group that represents staff (if you have multiple groups, you may have to repeat this)
-
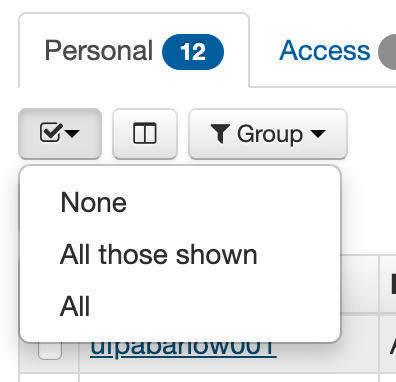
Use the select all option (to the far left of the group button)
-
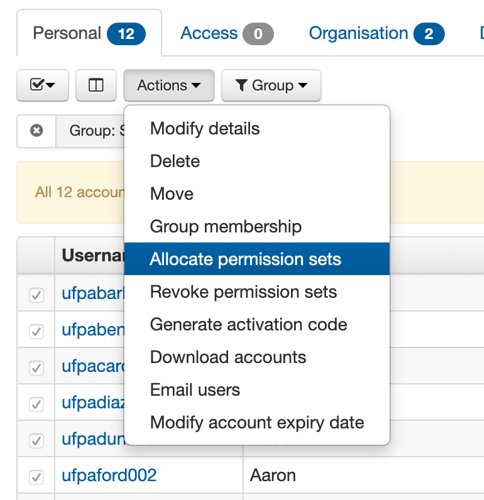
From the actions button that has appeared, select the allocate permission sets option
-
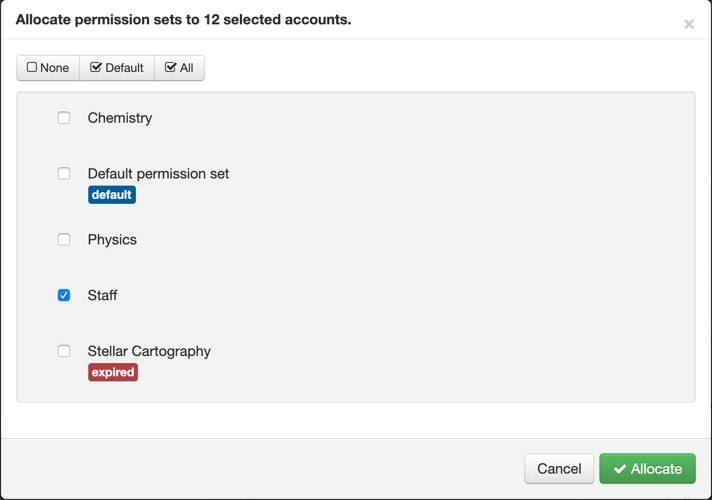
Tick your staff permission set and then allocate
Then repeat for students (do staff first because they are usually the smaller group and it probably leaves 'everything else' to be assigned to student)
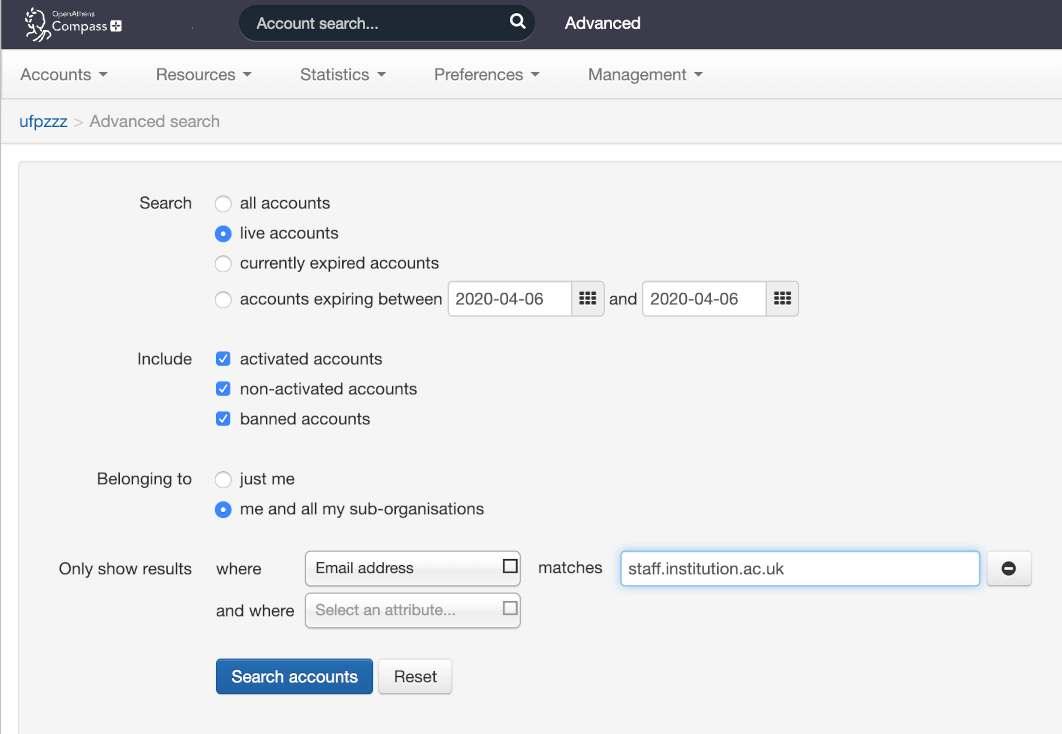
If your staff have different distinguishing features, use search. This example assumes staff have a slightly different email domain:
-
Click on 'Advanced' next to the search box at the top of the page
-
Set the options as
-
Live accounts
-
Include all types of accounts
-
me and all my sub-organisations
-
Only show results where...
-
-
It's at this point you pick your distinguishing attribute or attributes. Let's assume for this example that student emails are all something@institution.ac.uk and staff are all something@staff.inst.ac.uk. For this you would choose where Email address matches
staff.inst.ac.uk. -
From the result list, select all and then use the actions button to assign your staff permission set as above
Then do similar for the students (e.g. search for institution.ac.uk, or -staff.inst.ac.uk).
I can't tell staff and student apart by any existing means
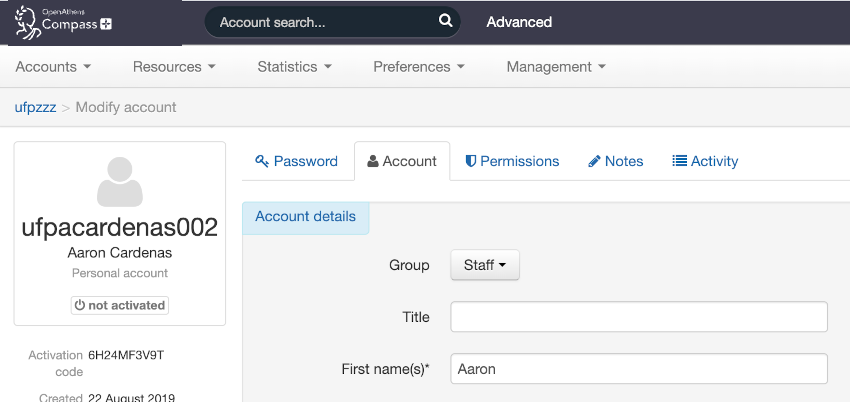
You will need to identify one of the two groups manually and add them to a group (a group is suggested because they can only be in one group, and there's a 'not in a group' option to identify the others). Identifying staff accounts is likely to be the easier option.
For each staff account, either open up the details, go to the account tab and use the group button at the top of the page... or select them in the list and use the actions menu. Once you've identified all staff this way you can use the group method above.
I’m using a local directory
I can tell staff and student apart by some factor
Use this information to assign the staff or student permission sets as covered in Permission set rules.
I can't tell staff and student apart at the moment
You'll need to speak to your IT people to find out which user attribute or claim can do this, then have them identify it to you and ensure it is available to you. Then you can proceed as above.
What to do if I'm stuck...
If a nice cup of tea hasn't helped, our service desk will be able to.