This page should take you from the creation of an application record through to being able to test. It will link off to other areas of the documentation for more detail where necessary and there will be several crossovers with the main Integrate OpenAthens Keystone pages. Our service desk will be happy to help if there's anything you're not sure about.
Prerequisites
-
Admin credentials for OpenAthens Compass
-
An OpenAthens personal account to test with. To make one, log in at admin.openathens.net with your Compass admin credentials, click the big add account button and complete the wizard (this should send you an email).
Method
Create the application record
-
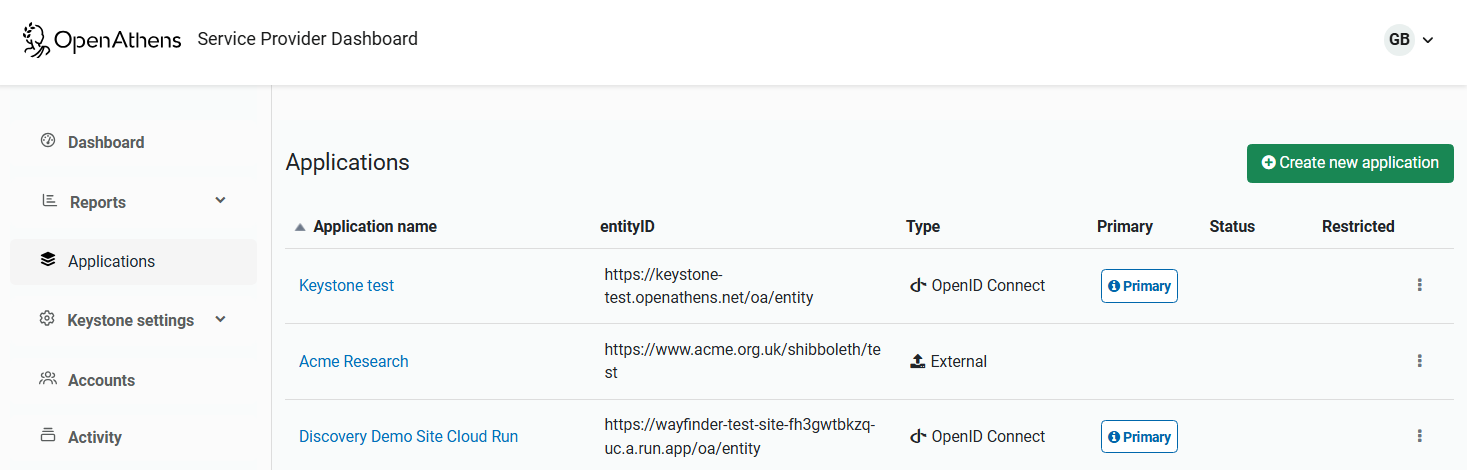
Access the OpenAthens service provider dashboard at https://sp.openathens.net.
-
Select Applications from the main menu and click the Create new application button at the top of the page.
-
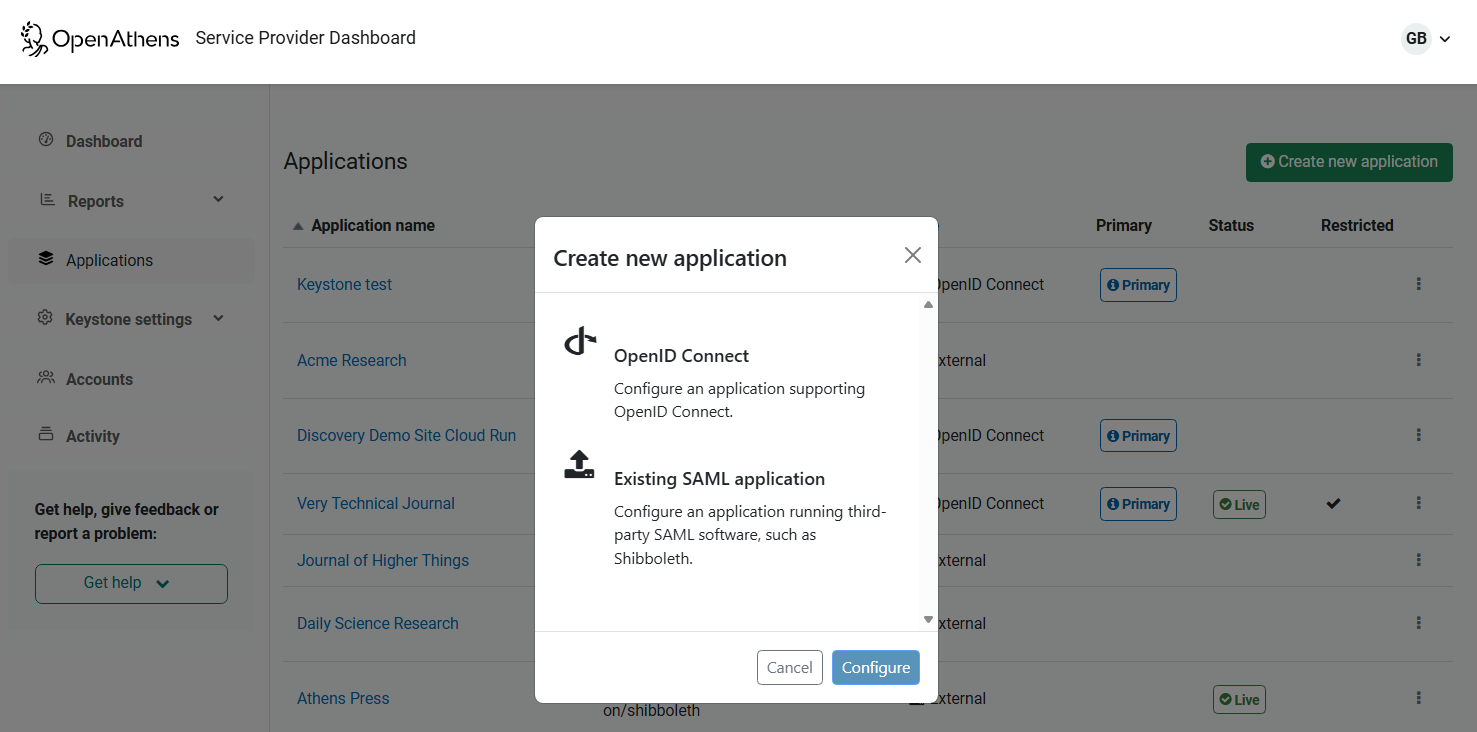
From the dialog box, select OpenID Connect and then the Configure button.
-
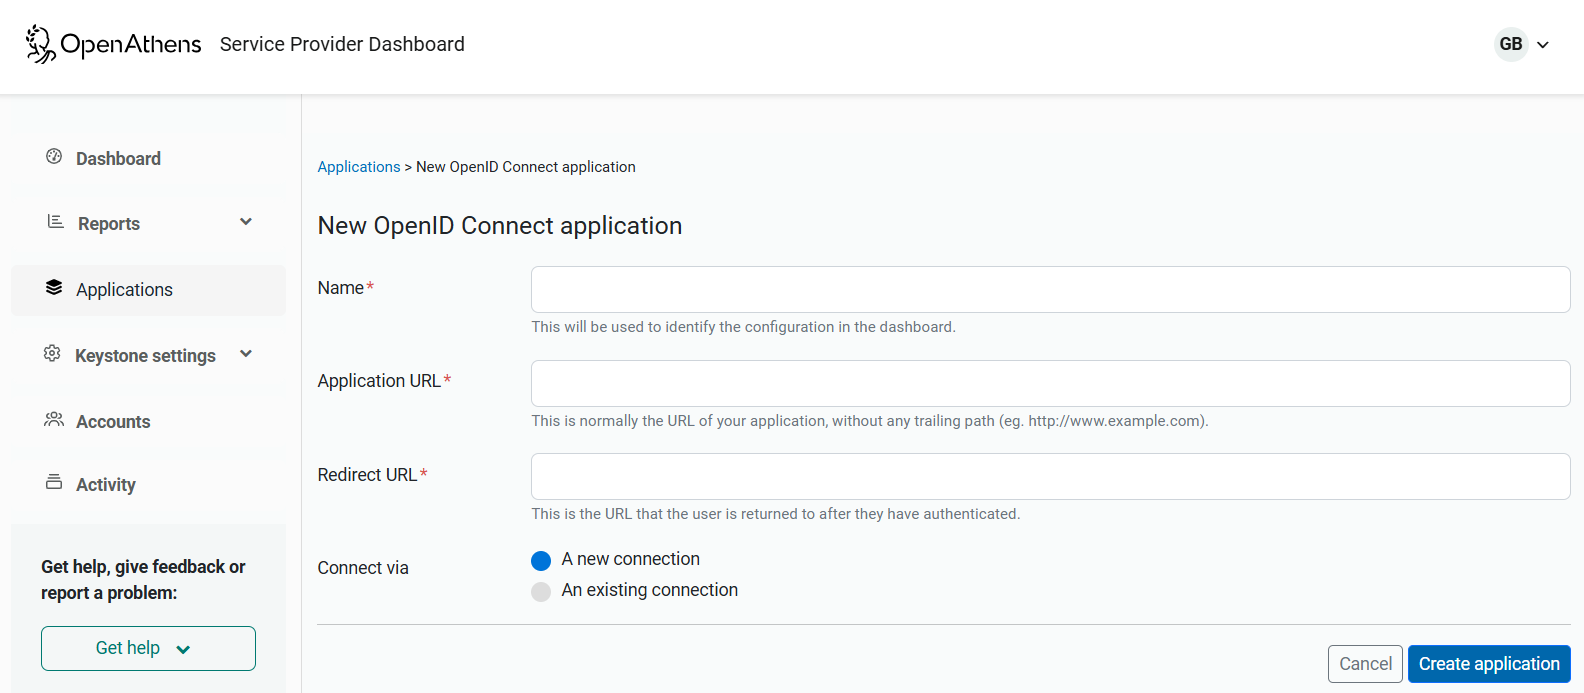
Fill in the three fields.
-
Name: This can be changed later. It will ultimately be the name of your resource we present to our mutual customers, but for now it only needs to make sense to you for identifying the application and connection in the interface.
-
Application URL: This is the DNS address of your application without any path - e.g.
http://www.example.com. -
Redirect URL: This is where in your application the user is returned by OpenAthens. It is specified without any parameters you might use for things such as the eventual target page. Your OIDC plug-in or framework will usually be able to tell you the path for this (some allow you to specify it), but if you are unsure you can leave it as the default and update it later when you get an invalid redirect URL error during your first test (you'll see the correct path in the URL when you get the error).
-
-
Leave the connect option as a new connection and hit the Create application button (for more about Keystone connections, see Using a connection for multiple OIDC applications).
-
This will now create the application record and connection that will be used and display the three key pieces of information that you will need to configure your OpenID Connect software. You can look these up at any time via the application record.
Configure your OpenID Connect software
This part is where we have to leave you to your own devices to an extent since installing or updating an OpenID Connect framework or plug-in in your code and setting up your pages to invoke it is, by its very nature, somewhat bespoke. We have provided some examples using various frameworks for reference though, and there is also information on best practices for interacting with federated users.
There are at least three items you will need to specify in your OIDC software's configuration and depending on your software you may need to specify more. Here are all the things you might need:
|
Item |
AKA |
Typical value |
Notes |
|---|---|---|---|
|
Client ID |
|
example.com.oidc-app-v1.cabwe529-c743-45b8-b6ce-acab92f3f156 |
Always necessary. Copy from the application record's configuration tab |
|
Client Secret |
Secret Key, Client Key |
aFaKEUP4Uu9o32SqcPk1Pxkdohu |
Always necessary. Copy from the application record's configuration tab |
|
Provider URI |
|
https://connect.openathens.net |
Many clients need only this to configure everything else as the OIDC protocol includes a standard path for further data (e.g: http://connect.openathens.net/.well-known/openid-configuration) If it does not ask for this, it probably asks for separate login, userinfo and token endpoints.
|
|
|
|
|
|
|
Login endpoint |
Login URI |
https://connect.openathens.net/oidc/auth |
Where the user is directed to be authenticated |
|
Userinfo endpoint |
UserInfo URI |
https://connect.openathens.net/oidc/userinfo |
Where the user's attributes can be read from |
|
Token validation endpoint |
Token URI |
https://connect.openathens.net/oidc/token |
Where the software checks that the token returned via the user's browser is valid. The software has 10 minutes to check this. Should not be used as a way of maintaining a session. |
|
JWKS endpoint |
JWKS URI, |
https://connect.openathens.net/oidc/jwks |
For JSON Web Keys |
|
OpenID Scope |
Scope |
openid |
The OpenID scope represents a collection of OpenID claims. The only one you need to specify for OpenAthens Keystone if your client asks for it is “openid”. The word “Scope” has a different meaning in SAML federations (it is an organization identifier), but more on that later. |
The supported token endpoint authentication methods are client_secret_post and client_secret_basic.
Mapping rules and testing
If you get an invalid redirect URL message on your first test, extract the redirect URL from the web address of the error message (specifically the redirect_uri parameter) and update the application record (Applications > choose application > Configuration tab) with this value. This may have been expected if you were unsure about what to enter when you first created the application record.
At the moment you have a situation where, if you invoke the login, you will get transferred to OpenAthens where you can enter your OpenAthens personal account credentials and then get sent back to your application. Various claims are returned, but only one is potentially relevant to authorization of an end user and then only if you never need to tell the different parts of a consortium apart (the realmName contains the SAML entityID of the user's home organization, but all OUs of that organization share that ID).
Mapping rules are the part that lets OpenID Connect work with SAML federations because it converts the attributes sent by the SAML identity provider (IdP) within the federation to the claims your OpenID Connect client can consume and make available to your application for authorizing and/or mapping users. These SAML attributes will contain the persistent user identifiers and organization identifiers you need. It's a bit more complicated than that of course, but that is the essence.
If you have so far just set up a basic page that perhaps displays the claims that have been received, the next step is to turn on the default rules and see what they do:
-
Access the service provider dashboard again (https://sp.openathens.net).
-
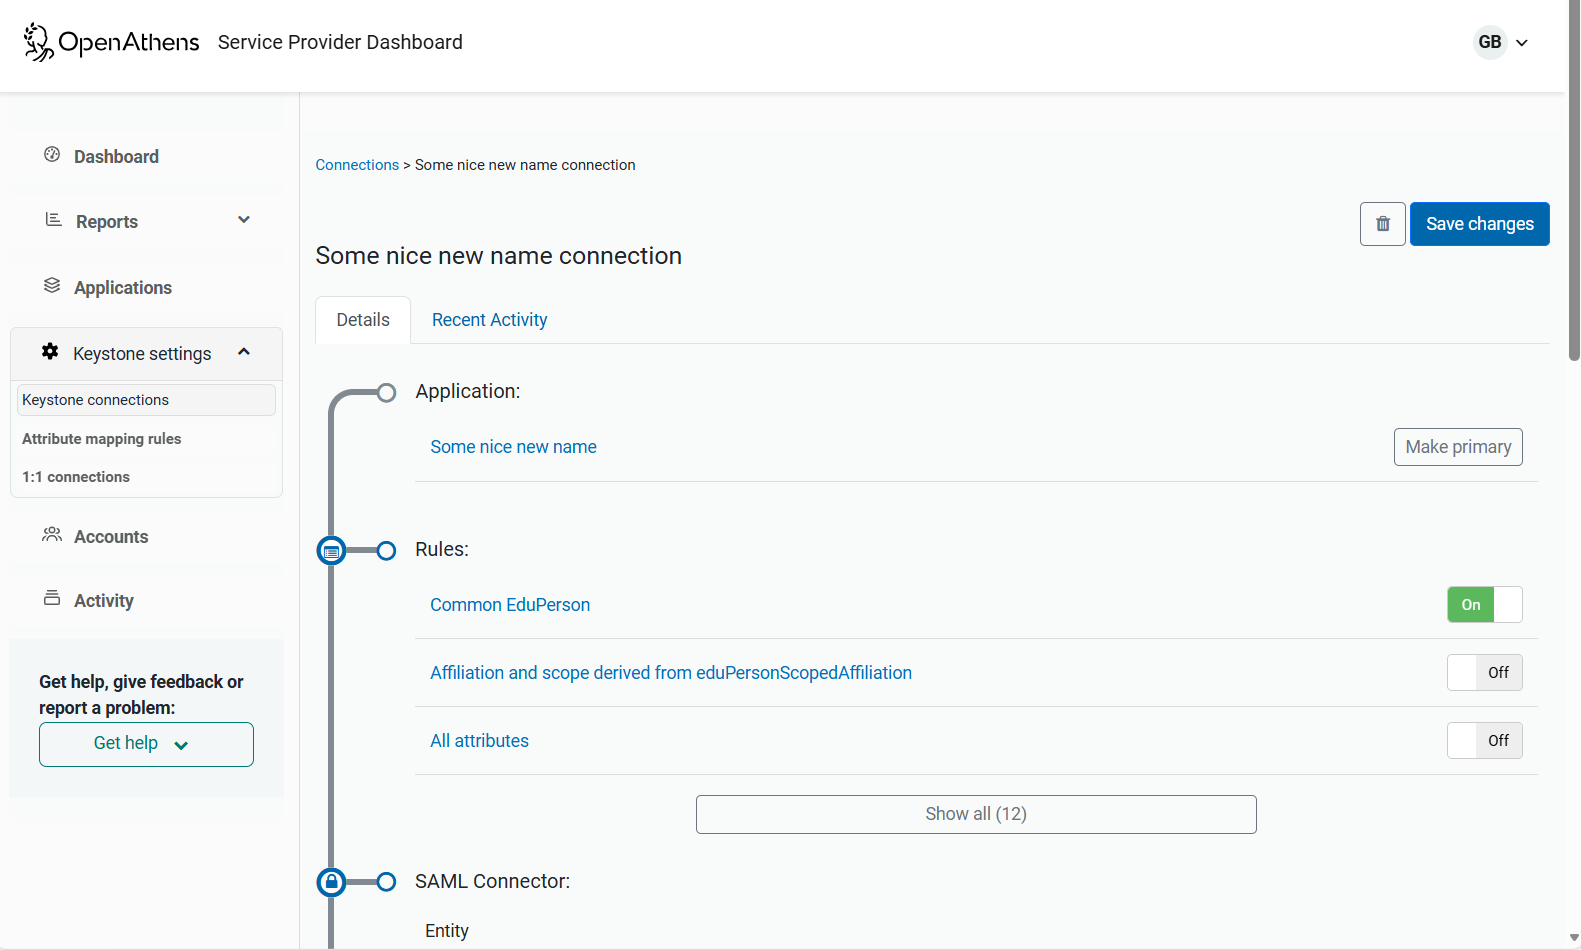
Go to: Keystone settings > Keystone connections > choose your connection.
-
Check that the '
Common EduPerson'& the 'Affiliation and scope derived from...'rules are turned on. -
Save.
If you return to your page and re-authenticate, you should now see that more attributes have been mapped.
The Legacy OpenAthens rule should, in most cases, be left off - it is only of use to aid you in migrating from an older OpenAthens system. It must not be used for authorization as it uses attributes not available in other federations and that are being phased out in the OpenAthens federation.
The Common EduPerson rule will usually be useful as it will translate all the main EduPerson attributes likely to be sent by a federated provider. Providers outside of a federation such as ADFS or Ping will not send these and will need their own mappings. The rules will not interfere with each other and can map multiple source attributes to the same claim.
The mappings in the Common EduPerson rule are listed here, and there is also a full list of eduPerson attributes available (as found in the Extended EduPerson rule).
|
SAML attribute |
What is it? |
Typical value where relevant |
Claim |
|---|---|---|---|
|
|
The “Entitlement” value for a user. This one is technically in common usage, but few service providers ask for it. Is used to do more granular groupings than roles - e.g. if a library service could not afford to buy access for all 20,000 students, but could for the 150 geology staff and students, they could pass you an entitlement value for just the geologists, and you can make a sale. You define the value that you want them to pass for the group of users. |
geology |
eduPersonEntitlement |
|
|
The “scopedAffiliation” of the user. A two-part identifier consisting of a role and a federation_scope. This attribute may be multi-valued, so if using any part of this for authorization the condition should be inclusive rather than exclusive. This is generally released by default for any user in any federation. Role values are defined by the federation. Most federations are academic, so roles are typically one or more of: member, staff, student, faculty, alum, library-walk-in, affiliate, employee. The federation scope is the organization identifier and can identify sub-organizations too - e.g. a group of hospitals might have a root federation scope of It is best to base authorization on the claim(s) in this attribute. |
|
eduPersonScopedAffiliation |
|
|
The “targetedID” of the user. An opaque user ID that is provided by default for any OpenAthens federation user, and is in general use in all major federations. It is persistent for a user so long as federation entityIDs do not change. |
|
|
If you need any other data from a federation identity provider, you would need to arrange that with them on a case by case basis. You will find though that in general they will be reluctant to release personally identifiable information to you without a good reason and you should bear that in mind when setting up your app.
If those names are inconvenient or your application is already set up to authorize on an existing claim, you can set up your own mapping rules. There are two types of rule you can set up and both are very flexible.
Simple mapping rules
As you would imagine, these allow you to specify an incoming and outgoing attribute name. They can also modify both the name and value using regular expressions - e.g:
|
Type |
Incoming |
Outgoing |
Notes |
|---|---|---|---|
|
Name |
|
|
Changes the attribute name |
|
Name |
|
|
Strips everything before the final slash in a name and replaces it with mynamespace - e.g. changes |
|
Value |
|
|
Removes all but the domain part of an |
|
Value |
(.*)@.* |
$1 |
Removes all but the role from an |
For more information, see Mapping SAML attributes to OIDC claims.
JavaScript mapping rule
There may come a time when the simple rules cannot provide the mappings that you need, either because the transformation is too complicated for a regular expression, or because a very large number of simple rules are required. In such a situation you can create a rule using JavaScript. There are limitations in execution time, and you can only have one but it affords the opportunity to do things with a script that would not otherwise be possible.
For more information, see Mapping SAML attributes to OIDC claims with Javascript.
Testing
So far you have logged in with one OpenAthens account. You can create more accounts with different properties and see what effects they have on your test application.
Preparing for wider use
At the moment this only works with your own OpenAthens accounts. To get this ready for use with subscribers there are two main considerations: federations and discovery. We'll start with discovery.
Discovery
End users will need a way to say which of your subscribers they are from so that they can be sent there for authentication. Sometimes they will arrive via what's called a WAYFless link, which will include an identifier for their organization that Keystone can use. However, if the user isn't coming from a library portal (e.g. they've used Google or Bing to find the content), then they'll need a way to say where they are from. This is called “Organization Discovery”.
The simplest way to support this is to enable OpenAthens Wayfinder on the discovery tab of the application - just select it and save. This will tell Keystone to refer users to https://wayfinder.openathens.net which will take care of it.
For details and for options including embedding Wayfinder in your site, see Enabling OpenAthens Wayfinder.
Until you go live in a federation, Wayfinder will only show you a small number of entities and only your own will work for you. If you have access to a test IdP you can add its metadata via the additional identity providers option and that will become available after a few minutes.
Federations
You will want to be in the same federation(s) as your customers, but lets start with the OpenAthens federation because that's the best one (also you can just push a couple of buttons to do it).
To enable a federation, configure your Keystone connection. There's a link at the top of the application record, or you can go to Keystone settings > Keystone connections in the side menu and select it there.
OpenAthens federation
Scroll down to the OpenAthens section and switch Allow sign-in for any OpenAthens domain from deny to allow. This will not make you live yet but will make some things on the Details tab of the application record mandatory and reveal a toggle for live and development. Toggling it live and saving will trigger our service desk to run some tests before pushing the button that puts you in the metadata and lets our mutual customers sign in. For details, see Getting production ready with Keystone.
Any other federation
Below the OpenAthens section is an Other Federations section. Find the federation you are interested in and toggle it from deny to allow and save. This will not make you live in that federation until they add your metadata. You will need to join that federation (procedures vary) and then send them your metadata which you can copy from the SAML connector section of your Keystone connection - next to your entity ID is a dots menu behind which are view and download options.