The process for groups and permission sets is essentially the same.
If you only have a few accounts, updating each of them manually is an option, but you probably have more.
Preparation
-
Decide which groups or permission sets will be replaced by which values of which custom attribute. These values are going to be case sensitive.
-
If updating based on permission sets, you will need to know the permission set name to identify them later. The name is the one with a # in it e.g.
ath#staff.
Add custom attributes and values
-
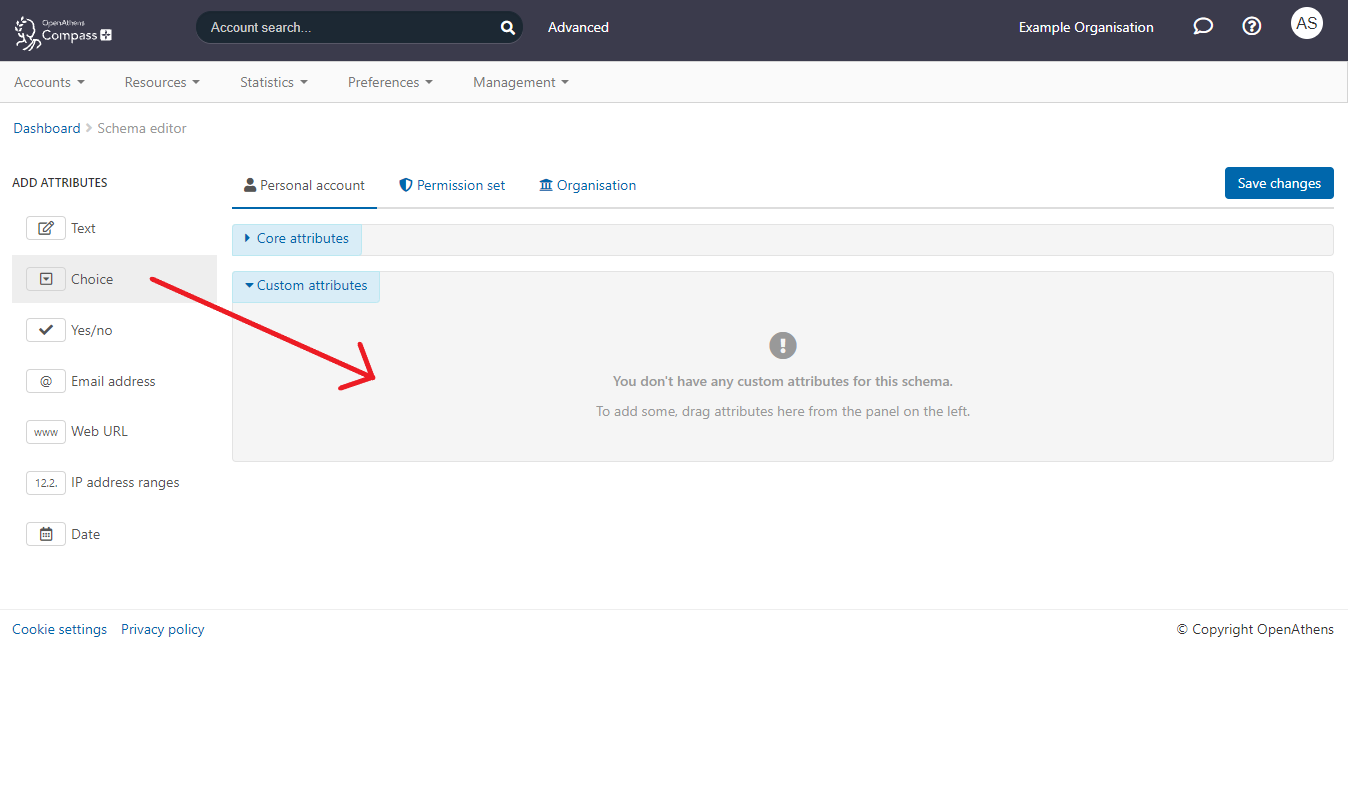
As the domain administrator go to Preferences > Schema editor
-
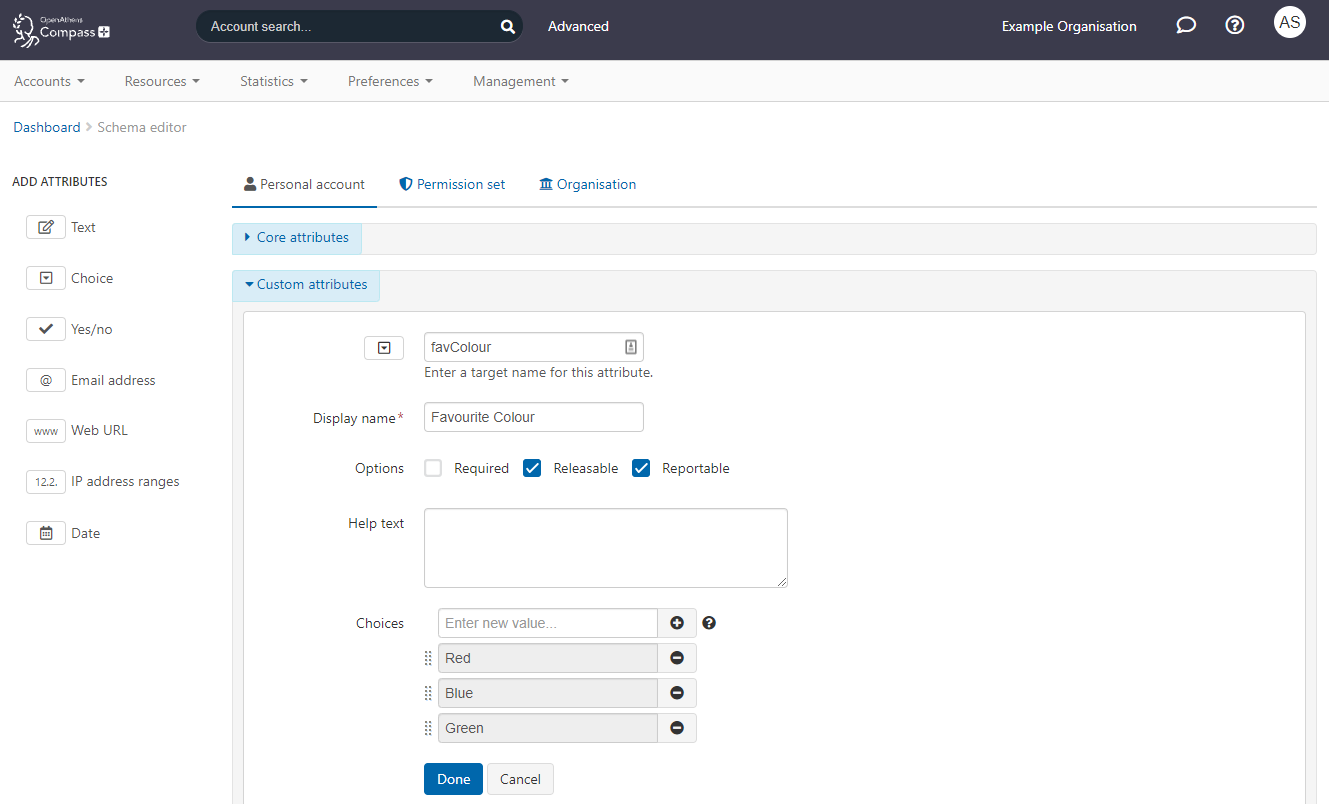
Add a suitable attribute type called whatever is appropriate. If this is something you will need to pass to another application, the target name is what you will need to match up. The choice attribute type is usually best for this as you can limit the possible values, so that is what is used in the examples, but if you are using a local connector a text attribute may be better as it will keep up with any changes in your directory.
-
Add the choices you decided during preparation
-
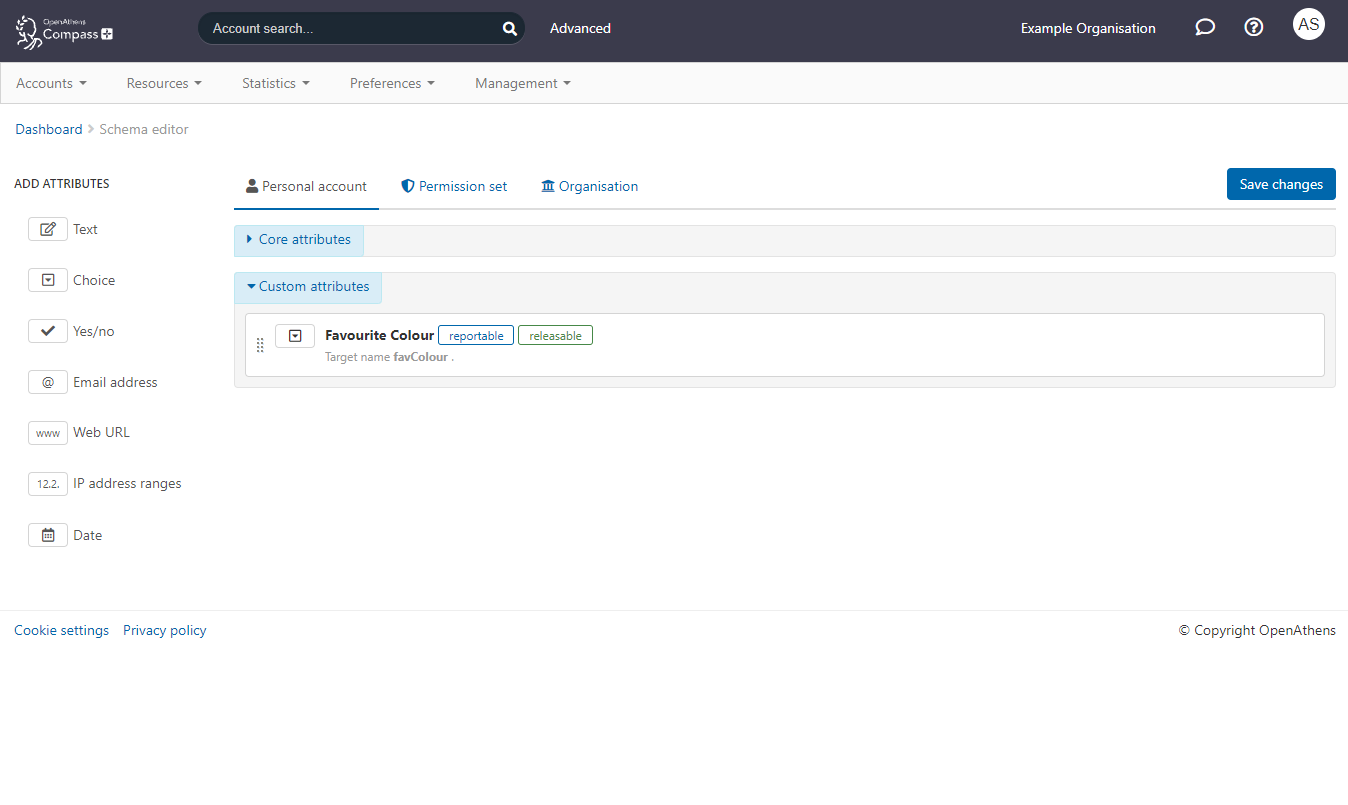
Save
You will probably want to mark it as required as well but the moment you do it will become active - anyone editing an existing account will not be able to save it until the data is added.
Bulk upload method
Download data
Here you have two options - you can either download all of your accounts and make all the changes at once, or you can filter your search results for a specific group or permission set before your download them. The following will work in all cases though.
-
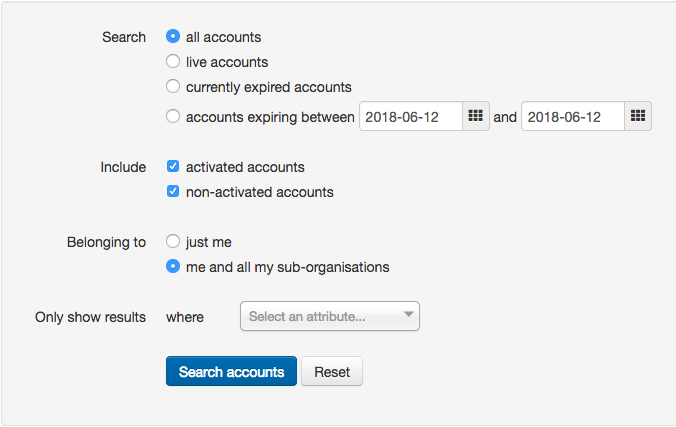
Advanced search > All accounts + activated accounts + non-activated accounts + me and all my sub-organisations
-
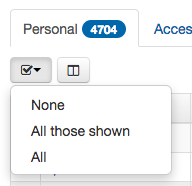
Select all
-
Actions > Download
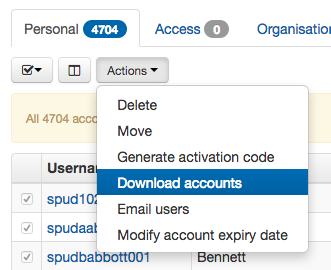
Grab the file from the download page when it is ready.
Modify data
-
Open up the downloaded file in your favourite spreadsheet package
-
Get rid of any columns that aren't going to be referenced or changed to make it easier to work with the data. You only need to keep the following columns:
-
adminUsername(if your data includes sub-organisations) -
username -
groups and or
permissionSets(as appropriate) -
attribute/attributeTargetName(the attribute you want to set)
-
-
Fill in the cells in the column for your new attribute based on the data in the group or permission set columns and save it as a CSV file. If your accounts have multiple permission sets, you may find that the filter function in your spreadsheet is more helpful than sort.
Choice attributes display in the downloaded file as drop down boxes - you can copy and paste into them though so long as the text matches the expected values exactly.
If you have more than 5000 lines of accounts you will need to split your upload into parts, each containing the header row, before the upload stage.
Upload data
-
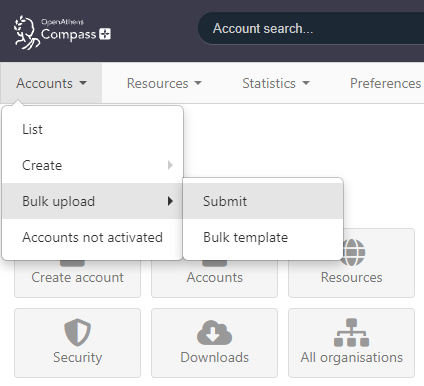
In the administration area go to Accounts > Bulk > Upload
-
Select modify on the first page
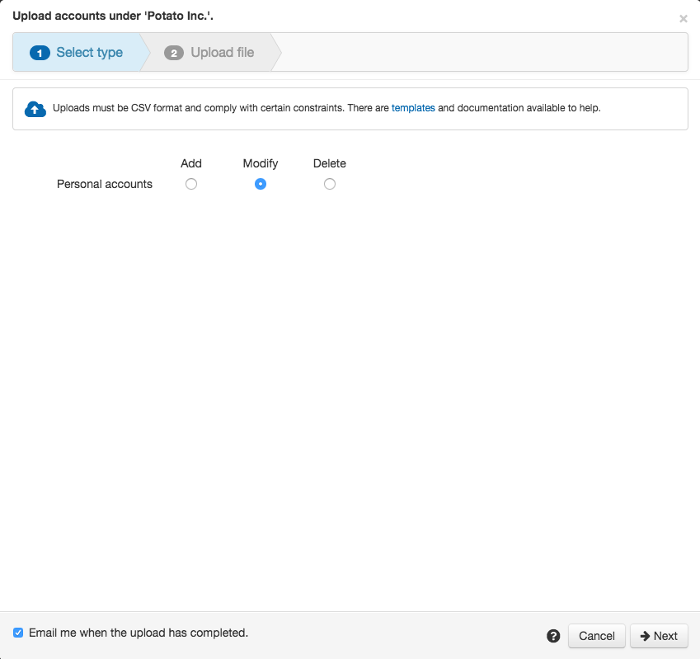
-
Select your CSV file on the second page and upload
Assuming there are no validation errors the file will be processed in the background and you will get an email when it is completed. This could take anywhere from a few seconds to an hour or more depending on the size of your upload and how many other uploads are being processed.
Repeat as necessary until done
If you downloaded multiple files for any reason, or if you need to change more than 5000 accounts you will have additional cycles to do.
Interface method
This can only be done one organisation at a time, not for multiple organisations:
Permission sets
This is best where you only have one permission set per user (or only one that you're interested in)
-
Go to Resources > Permission sets
-
Click on the person icon next to the first set to get a list of the users
-
Select all
-
From the actions menu select the modify details option
-
Set a value on the relevant attribute
-
Repeat for all your permission sets
Groups
-
Go to accounts list
-
From the group box, select the group you are interested in
-
Select all
-
From the actions menu select the modify details option
-
Set a value on the relevant attribute
-
Repeat for all groups
-
From the group box, select the accounts not in a group option
-
Populate the data for any you find there
.