The eduPersonAnalyticsTag attribute is a new attribute designed for COUNTER reports. You can use it to pass group information for service providers to include in your COUNTER reports. E.g: department, location, course and so on.
Not all service providers are able to support this, so you should discuss it with them before setting it up.
See the attribute spec for eduPersonAnalyticsTag.
This attribute should not be used to send information that could enable the identification of specific users.
The eduPersonAnalyticsTag is a multi-value attribute, which means that it is possible to pass more than one value at once for a single user. For example, if a student is on a course covered by two different departments, eduPersonAnalyticsTag might have two values: one for each department.
Because eduPersonAnalyticsTag is an attribute, the information can come from the same sources as any other attribute:
-
For OpenAthens managed accounts, it is provided when the user accounts are created or modified.
-
If you have a local connector, you can send the information from your local directory and map it in.
-
You could also assign values using permission sets.
Using an existing attribute
You may already have an attribute within OpenAthens that you use in reports. You can release it to service providers as eduPersonAnalyticsTag by setting an alias.
-
Go to Preferences > Attribute release
-
Click Add a release policy
-
Search for the resource that you are creating the policy for. Searching by the entityId is the most reliable way to find the specific resource

-
Select your attribute from the attribute list, along with any others the resource needs
-
Click on the Advanced button
-
Select your attribute from the drop-down list in the Attribute aliases section
-
Enter
urn:oid:1.3.6.1.4.1.5923.1.1.1.17as the name to be mapped to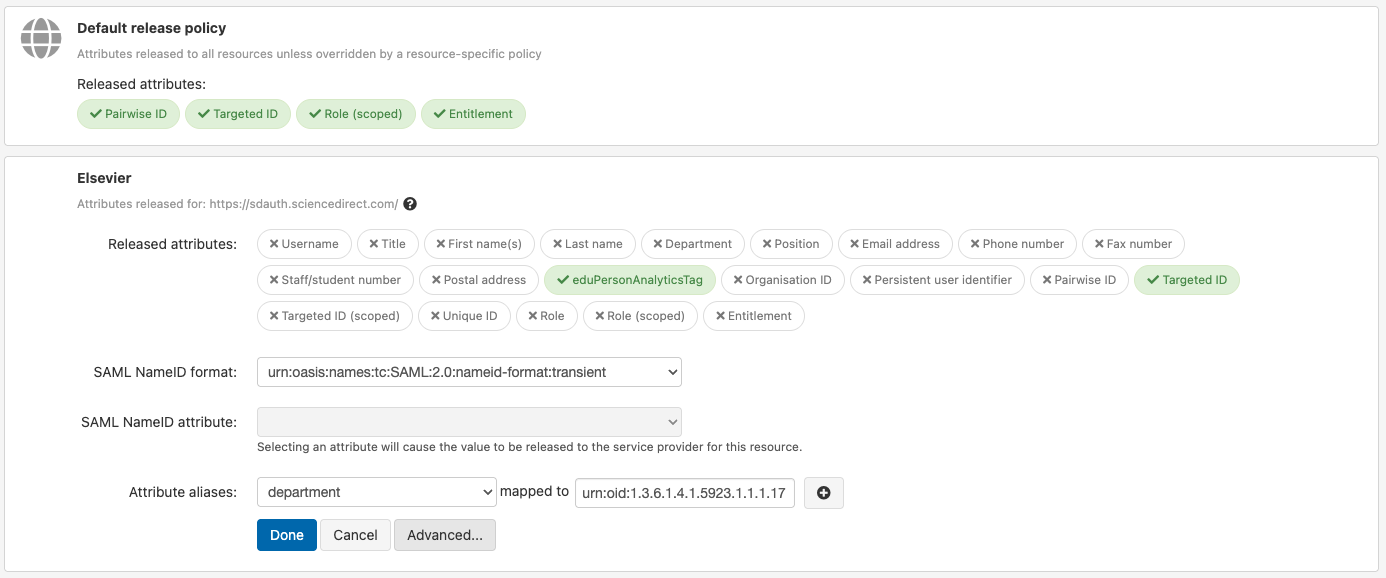
-
Click Done
-
Save and repeat for any other resources that you know support the attribute
Using a new attribute
Create a custom attribute
To start with, you will need to define a new attribute in the schema editor. If you are using self-registration, you will need to contact our service desk and ask them to set this up for you.
-
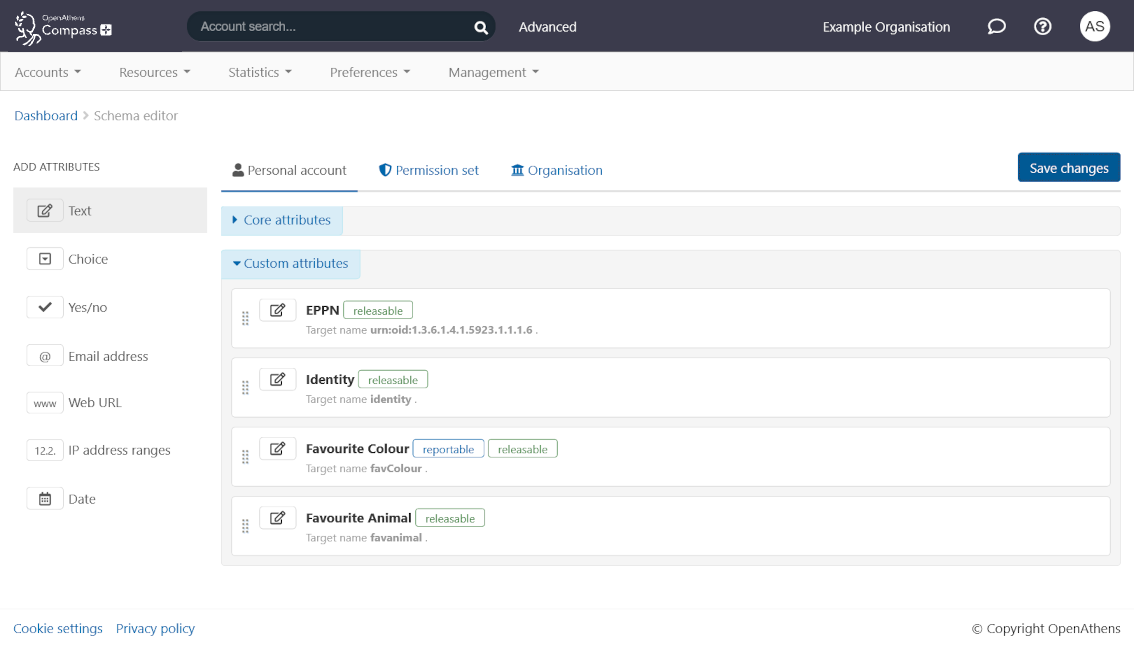
Log in to your admin account and go to Preferences > Schema editor
-
If you are going to use permission sets to assign values, go to the permission set tab, otherwise stay on the personal account tab
-
-
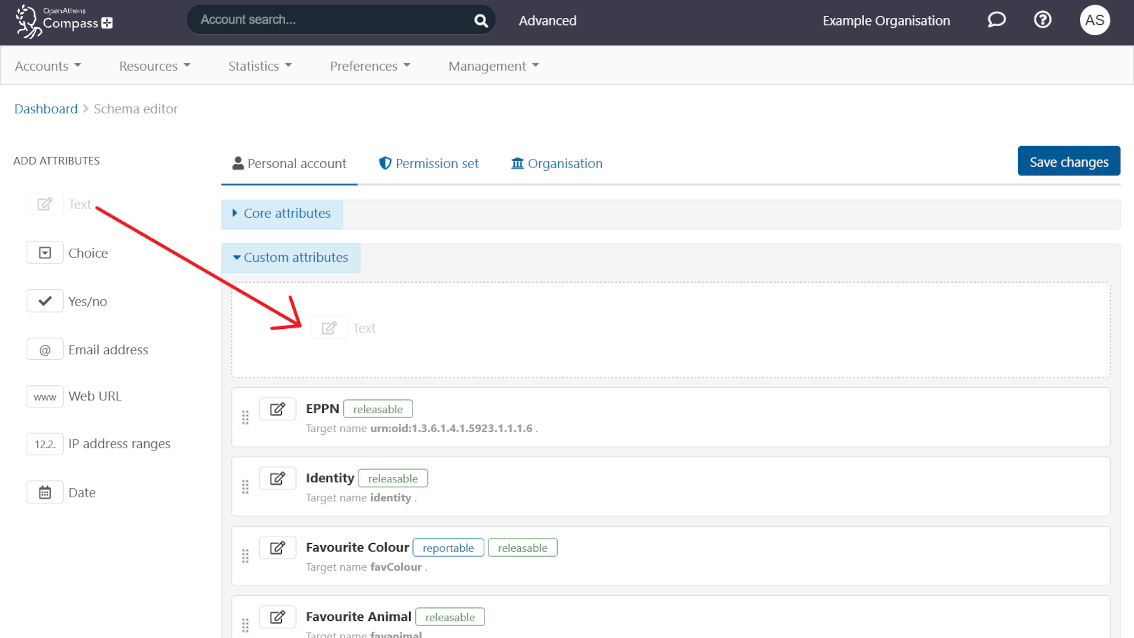
Click and drag the Text option to the custom attributes section. If you are using OpenAthens accounts, the choice attribute may be a better option as it will let you control which values can be selected.
-
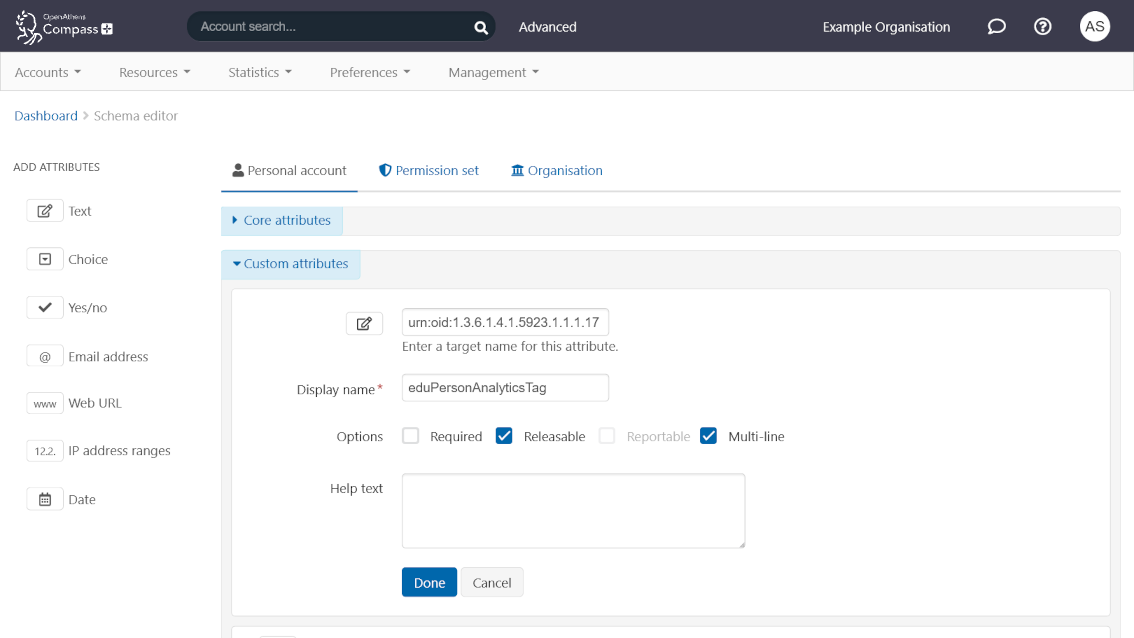
Enter a target name of
urn:oid:1.3.6.1.4.1.5923.1.1.1.17 -
Set eduPersonAnalyticsTag as the display name
-
Mark the attribute as releasable and reportable using the checkboxes
-
Click Done
-
Save
Retrieving/setting the information
If you are using local accounts
Next, you need to add a new mapping rule to your local connector. You should make sure that you have configured your local authentication service to release the necessary attribute before starting.
-
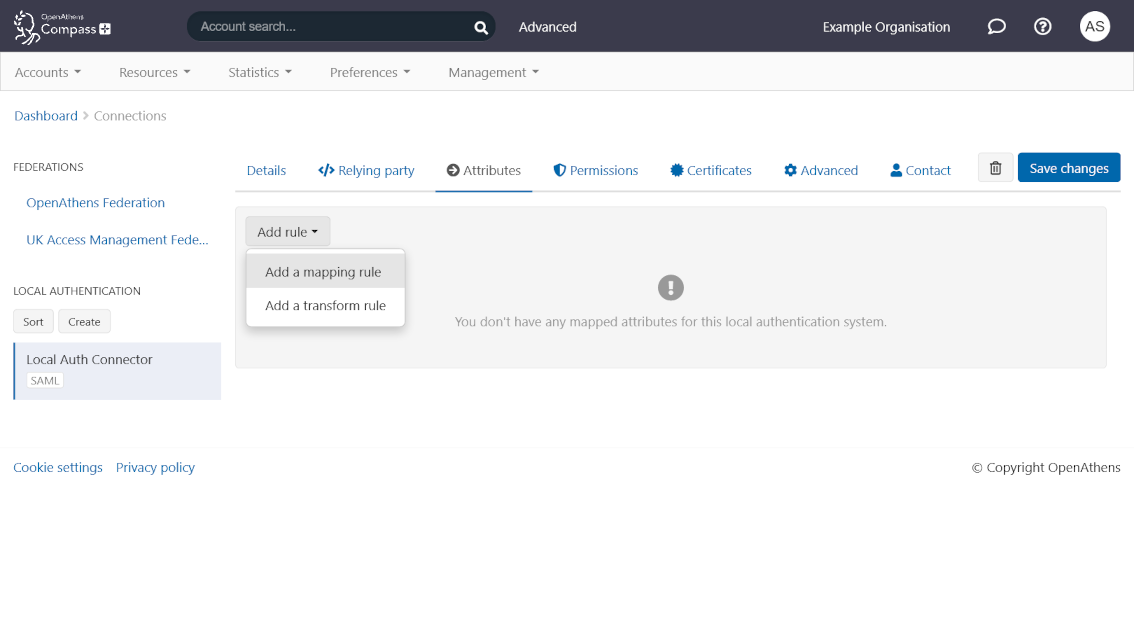
Go to Management > Connections and click on your local connector in the left sidebar
-
Open up the Attributes tab
-
Click on Add rule and select Add a mapping rule
-
Start typing
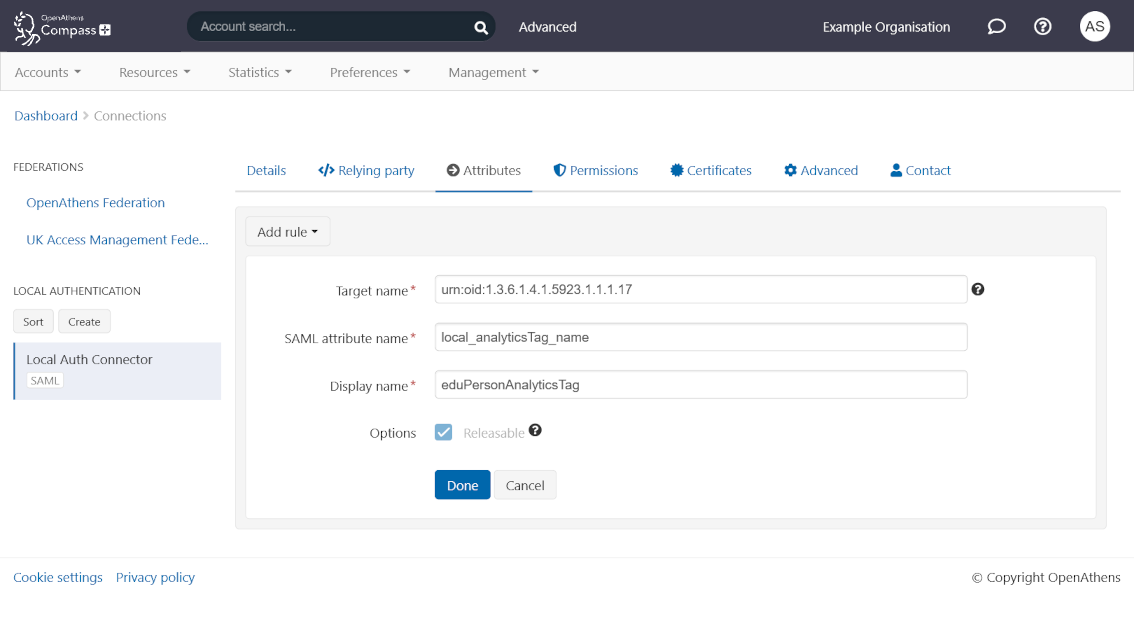
urn:oid:1.3.6.1.4.1.5923.1.1.1.17in the target name field and select it from the drop-down -
The SAML attribute name needs to be the name of the attribute or claim as it is released from your local authentication service
-
The display name should be eduPersonAnalyticsTag
-
Click Done
-
Save your changes
If you are using Permission sets
You’ll need to set the value of eduPersonAnalyticsTag for each applicable permission set.
-
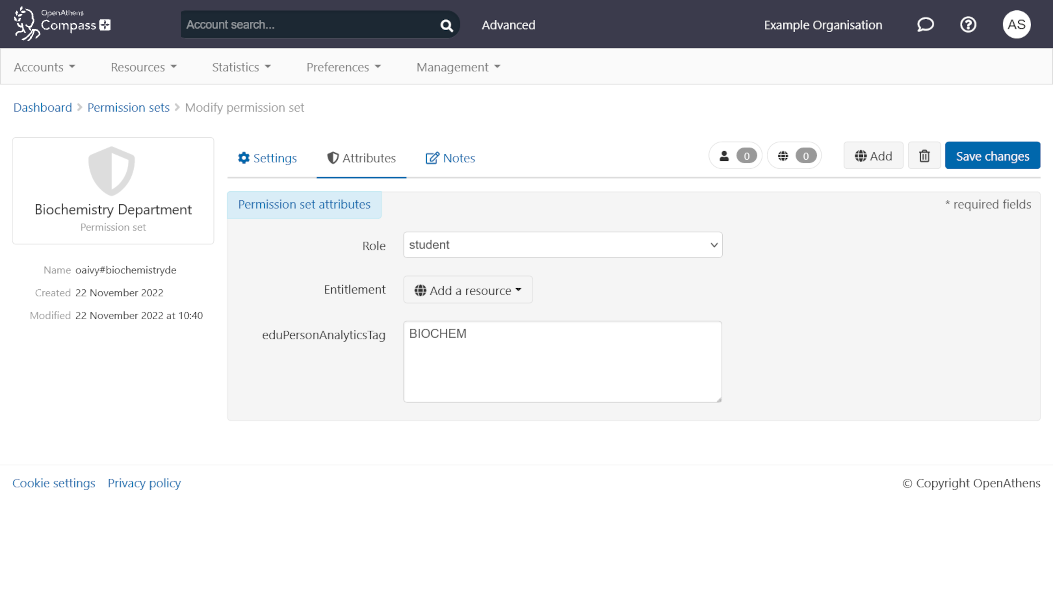
Go to Resources > Permission sets
-
Click on the permission set that you want to associate a value with
-
Go to the Attributes tab
-
Enter the value into the box labelled eduPersonAnalyticsTag
-
Save changes
Add an attribute release policy
Finally, you need to set up an attribute release policy for each resource that you wish to release your new attribute to.
-
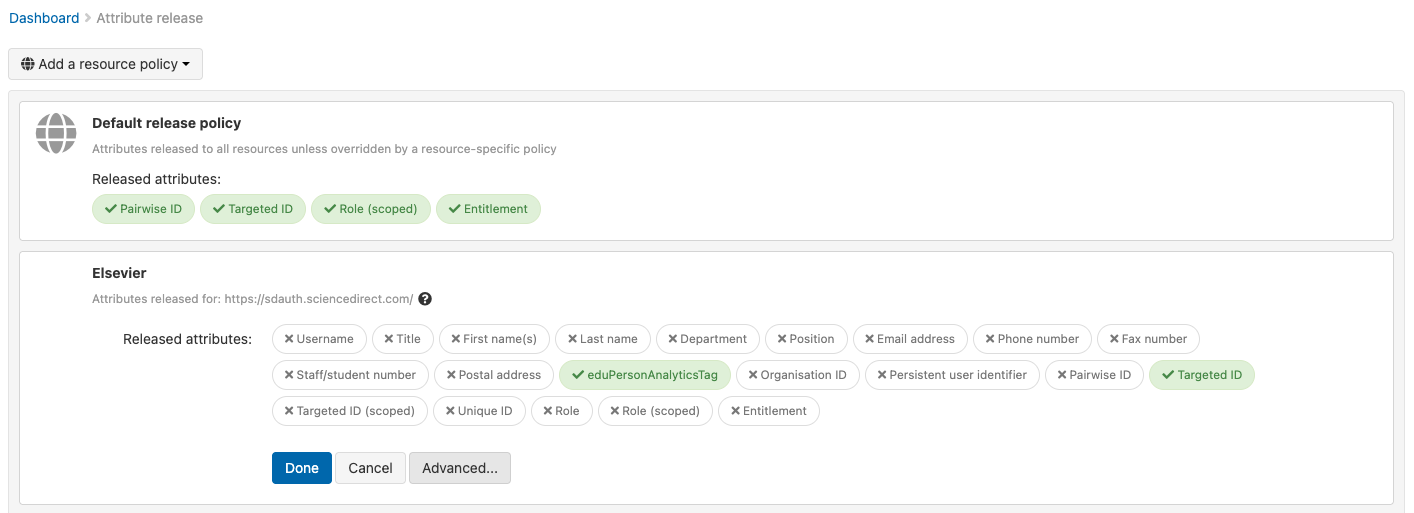
Go to Preferences > Attribute release
-
Click Add a release policy
-
Search for the resource that you are creating the policy for. Searching by the entityId is the most reliable way to find the specific resource
-
Select eduPersonAnalyticsTag from the attribute list along with any other attributes the resource needs
-
Click Done
-
Save