To delete accounts in bulk, you can upload a file containing the usernames of all the accounts you want to remove.
These are the basic steps:
-
Download users' data as a file
-
Edit the file, if necessary
-
Save the file in CSV format
-
Re-upload the file to the admin area
You can also delete multiple accounts from the Actions menu in the list of accounts. This might be easier if you’re dealing with a small number.
Download users' data as a file
-
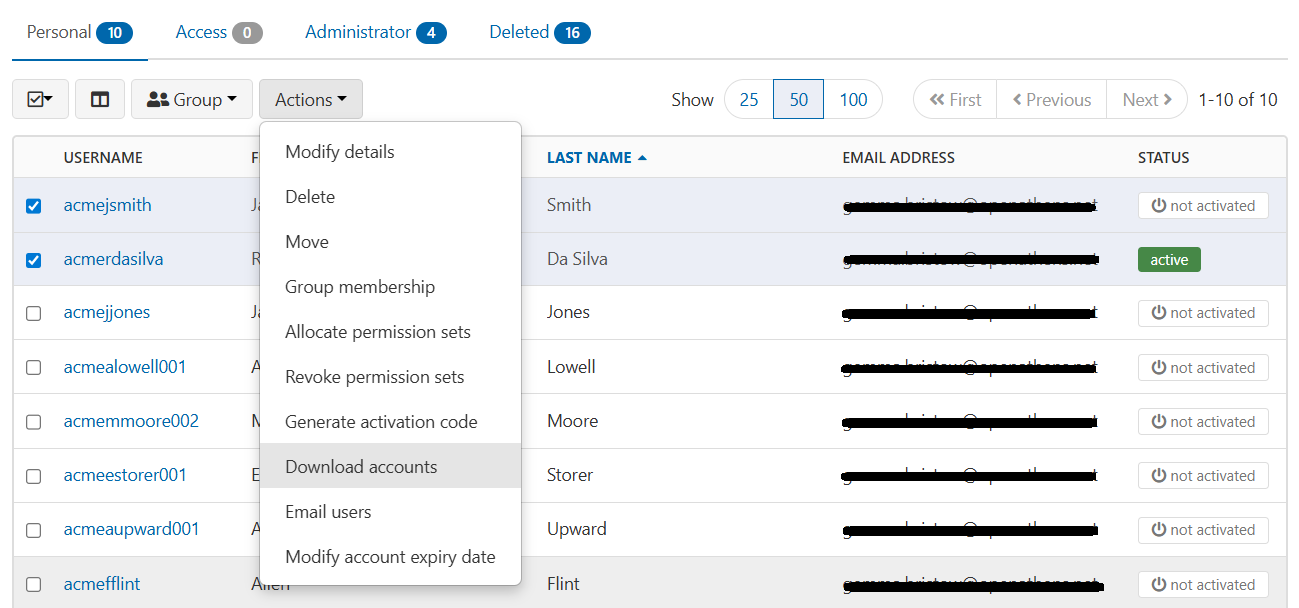
Go to Accounts > List > Personal. Find user accounts in the list or search for the accounts you want to delete. You can delete only personal accounts through bulk upload, not other types of account.
-
Tick all users whose accounts you want to delete.
-
From the Actions menu, select Download accounts.
-
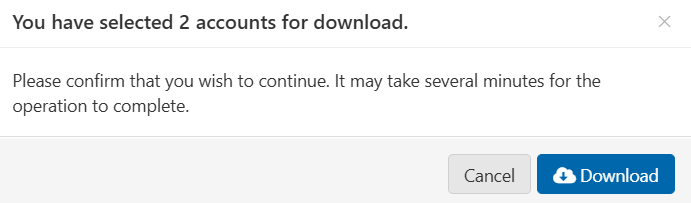
You are asked to confirm this action. Press Download to continue.
-
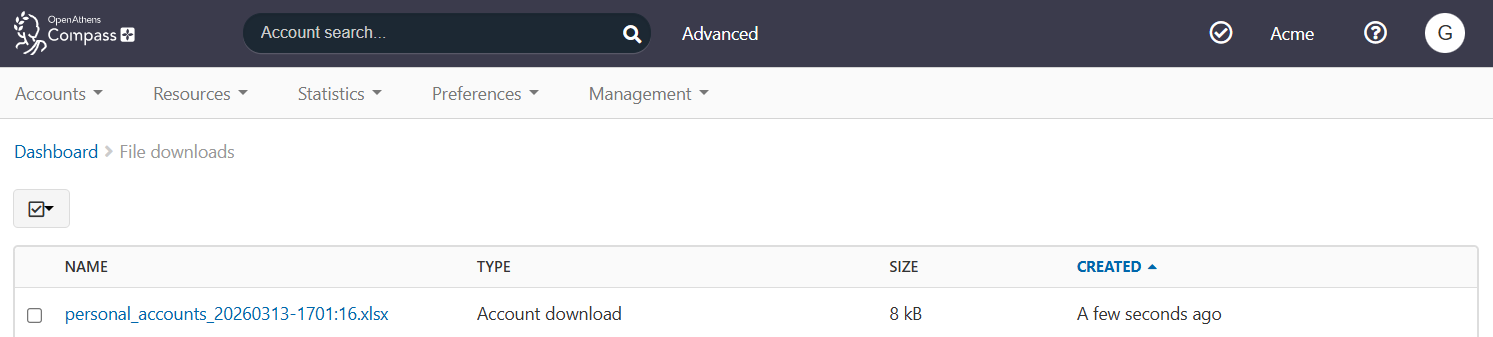
Go to Management > Downloads. You will find your file of account data listed under the type ‘Account download’.
-
Click the name of the file. It downloads automatically in your browser.
-
Save the file to your computer.
Edit the file
-
Check that the file includes only users whose accounts you want to delete. If you have accidentally included users that you want to keep, delete the rows containing those users' data.
-
To delete accounts, the file must include the username column. You can delete the other columns if you like, or leave them in the file without altering their contents. Columns other than username are optional but can still cause an error if they contain invalid input.
Save the file as CSV
The upload file must be in .csv format. The downloaded file is .xlsx. Once you have reviewed the data, convert the file.
-
In your spreadsheet program, select Save as and choose to save the file as .csv.
-
Since .csv files do not support multiple sheets, you may be asked to save ‘only the active sheet’. Agree.
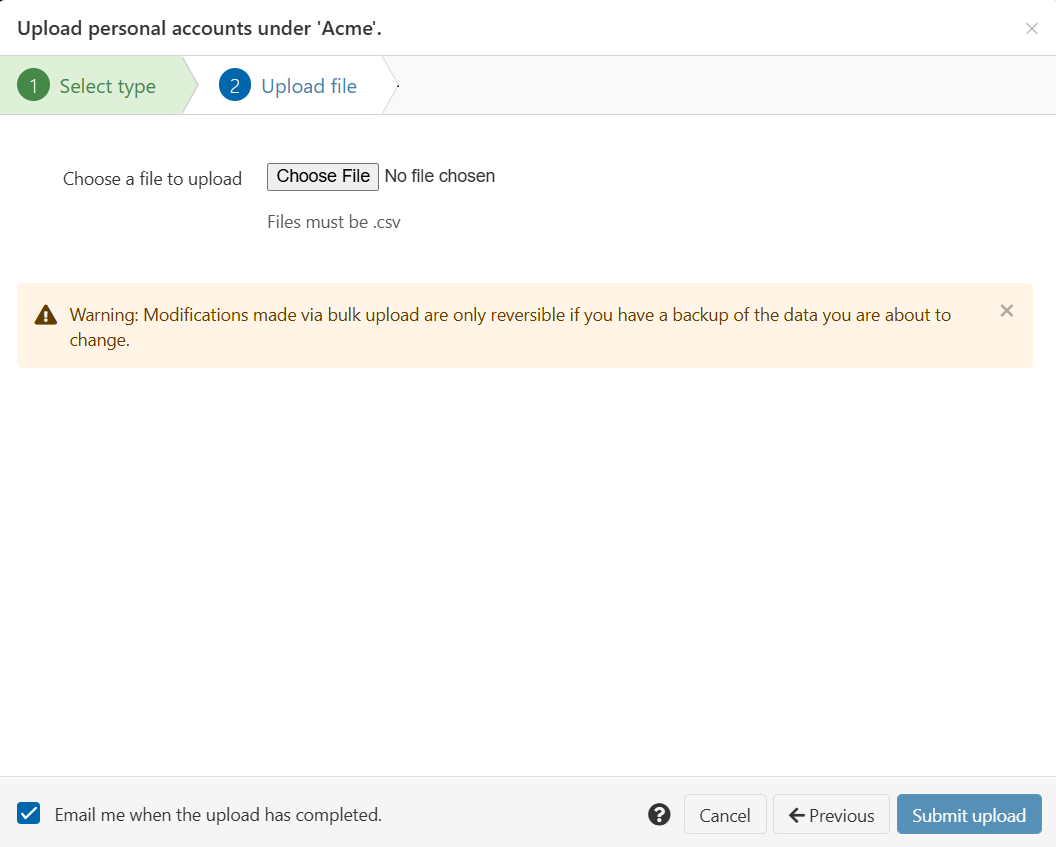
Upload the file
-
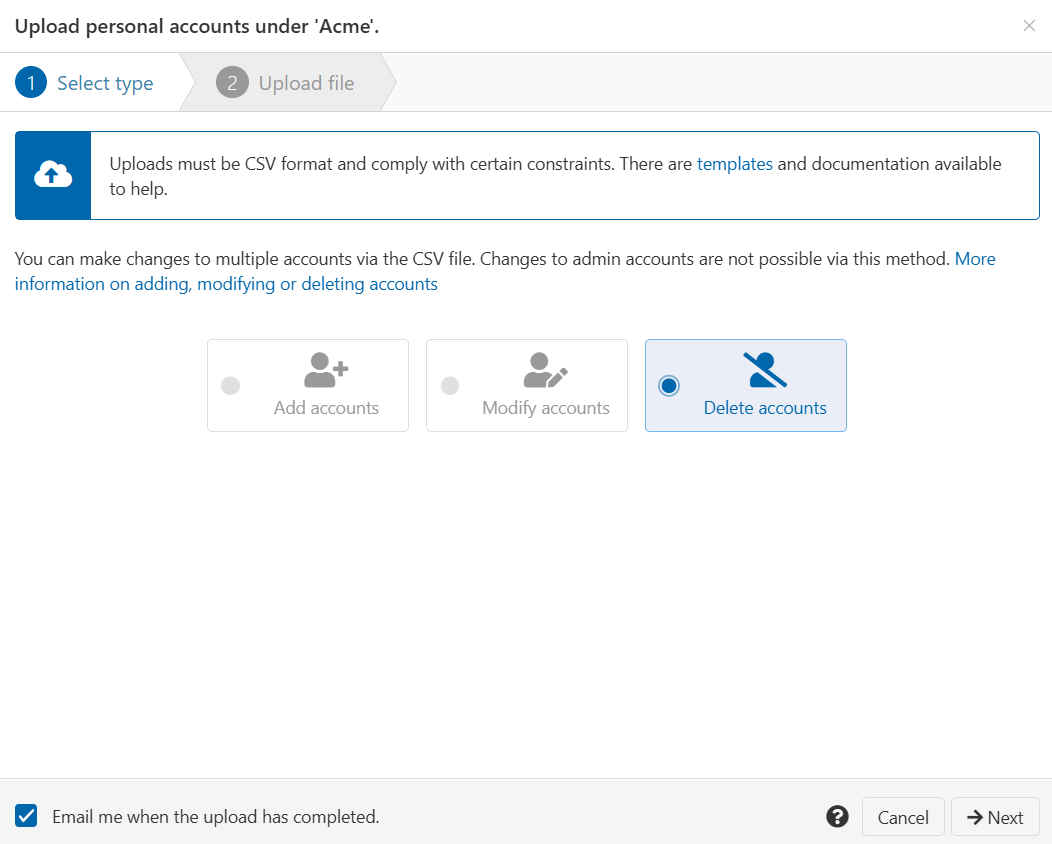
From the main menu, select Accounts > Bulk upload > Submit. A pop-up window opens, showing the file upload interface.
-
Select Delete accounts.
-
Press the Next button.
-
Press Choose File and select the .csv file from your computer.
-
Press the Submit upload button.
-
If the upload is successful, you receive an initial confirmation message, followed by another confirmation message when OpenAthens has finished deleting the accounts. (The time this takes depends on the size of the file.)

-
To check the result, search for one of the accounts from the upload file. This account should now have the deleted status.
-
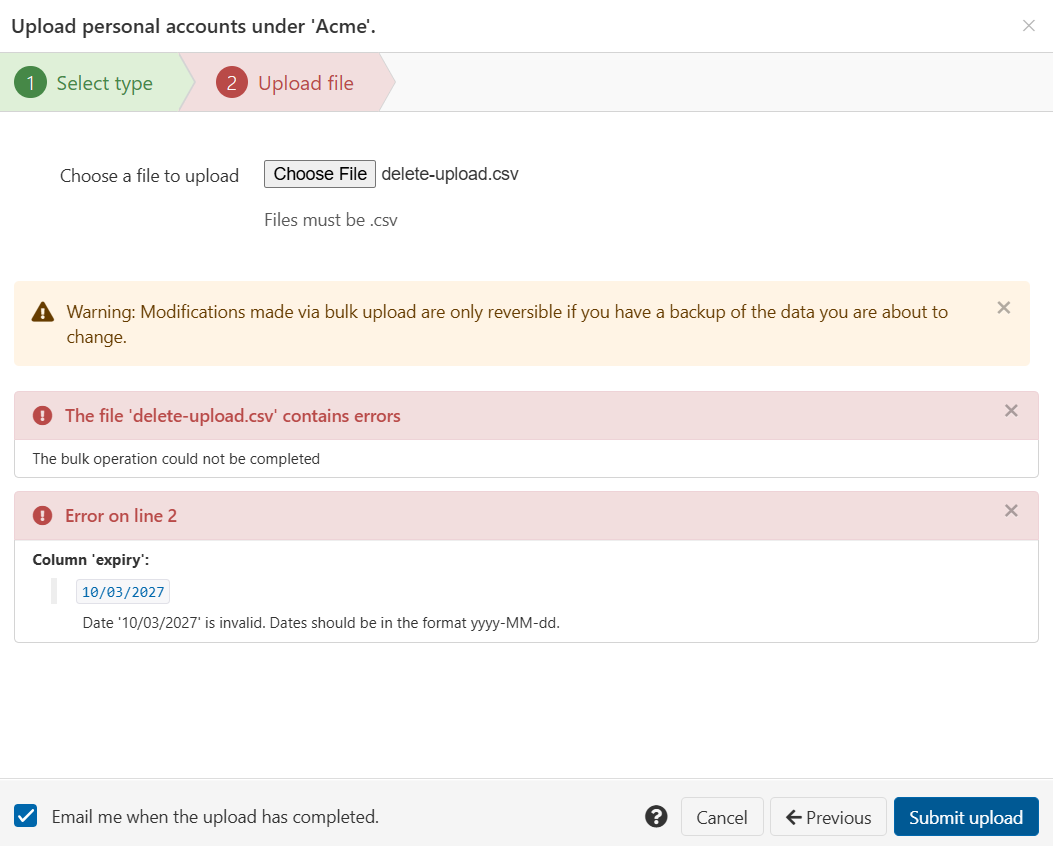
If upload fails, you receive an error message that explains the problem. See Troubleshooting. Edit the incorrect part of the file, save, and upload again. (The upload interface remains open at the same place, so you do not need to go through steps 1-3 again.)
Troubleshooting
If there is an issue with your uploaded file, you get an error message. For details of error messages, see create accounts in bulk or modify accounts in bulk.
When deleting users through bulk upload, the most important factors to check are:
-
The username column is present in the file
-
No username fields are empty
-
Each username is that of a registered user
The upload can also fail because of invalid data in other columns, such as an incorrectly formatted expiry date or a status that does not exist. Since you need only the username when deleting users, removing other columns from the file can prevent these errors.